
The Data Upload Wizard is the most common way to import data into SpatialKey. This article will walk through the steps of importing a dataset for the first time as well as updating or appending to an existing dataset, all using the Data Upload Wizard.
If you need sample data to try it out, check out our Sample CSV Data files.
Importing a new dataset
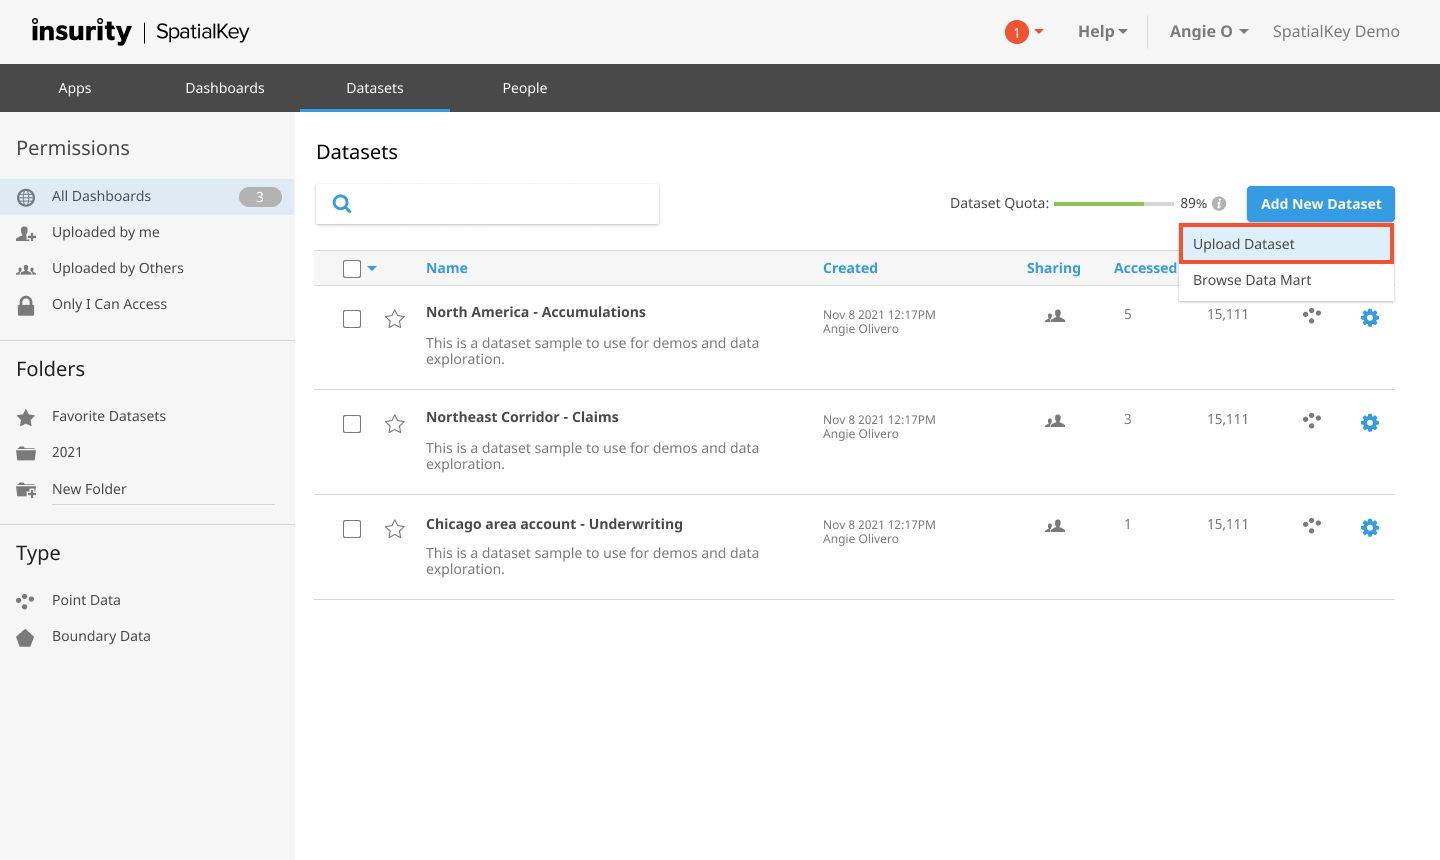
On the Datasets tab, click on the “Add New Dataset” button and select the “Upload Dataset” option.
The Data Upload Wizard will walk you through a few steps that will help SpatialKey learn about your data and how to plot it on a map.
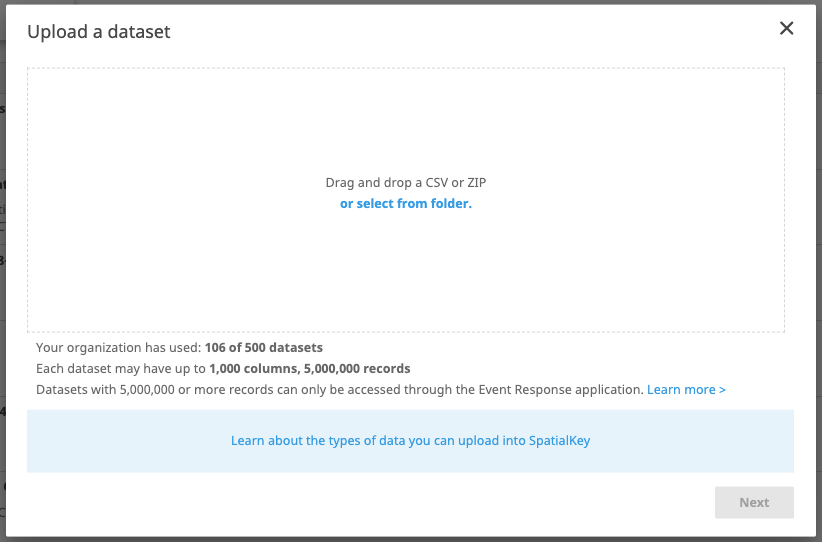
The first screen contains links describing what files types are supported for upload and also displays your organization’s limits, so you know how many records and columns are allowed for each dataset. Drag your file into the window or select a file from a folder to upload a dataset.
Selecting a shapefile: If the file you select is a shapefile, you will automatically skip to the final screen to name your dataset, configure email notifications, and opt to share this dataset with everyone in your organization.
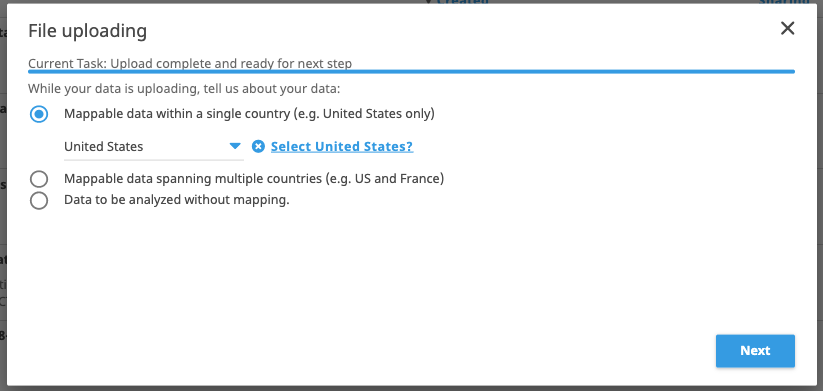
Selecting a CSV dataset: Once you select your dataset, SpatialKey will perform an initial upload of the file, so we can read from the columns in future steps. While the file is uploading, you are asked to identify whether your dataset contains a single or multiple countries, or whether it isn’t mappable. If your data cannot be mapped, you will go directly to the column setup and selection screen.
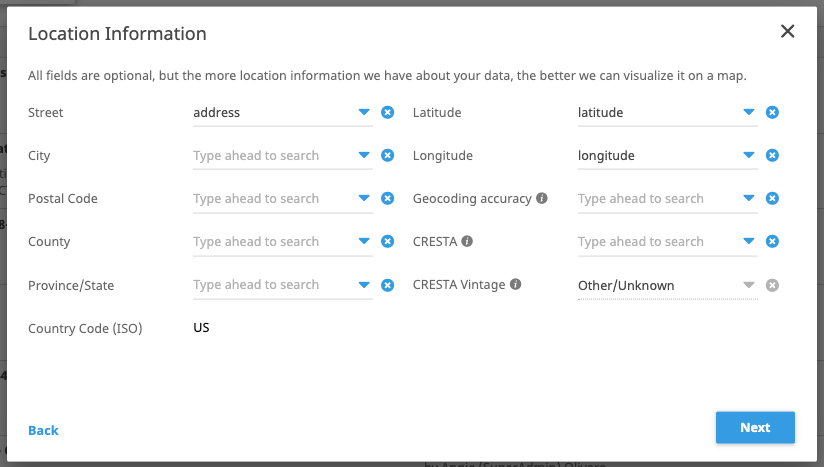
The next screen maps all your location data. SpatialKey will auto-detect most fields but check them over to make sure everything looks accurate. The more location information we have about your data, the better we can visualize it on a map.
On the geocoding screen you’ll see which geocoder is licensed for your organization and a confirmation as to whether you have enough geocoding credits. If your data is in the US, we’ll automatically provide thematic mapping for US Counties, Postal Codes and US States. With this information, we will be able to create thematic maps that show the distribution of a single metric by either state, county or postal code. For more information and an example, check out this article on Thematic Mapping.
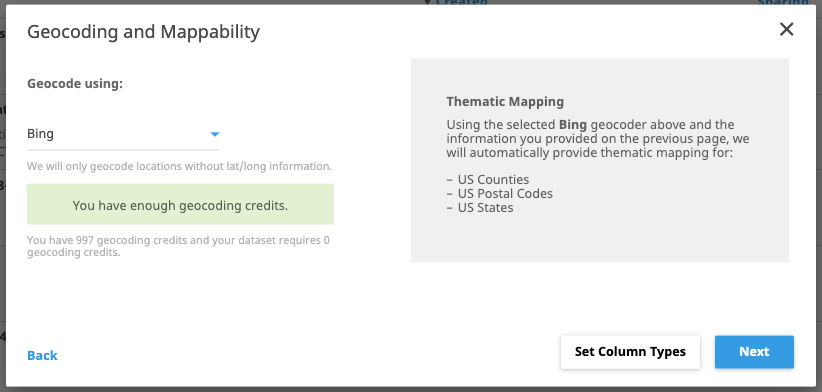
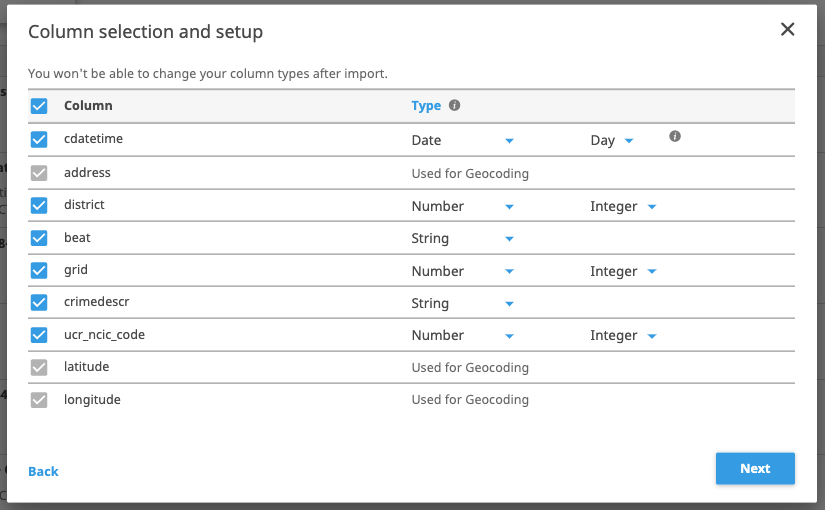
If you click the button to “Set Column Types” you’ll see how each field was detected. Most of your data will fall into one of three data types: String, Number or Date. Take the time to look over each column, what you choose here can have implications when viewing your data in a dashboard (e.g. you can only sum Numeric fields). Data type adjustments cannot be made after your data has been imported into SpatialKey.
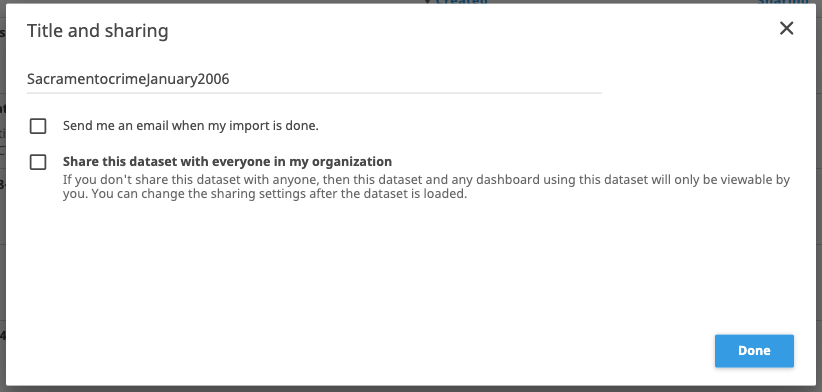
The final step is to name your dataset, request an email notification when the import completes, and opt to share this dataset with everyone in your organization. Part of the power of SpatialKey is being able to easily share and collaborate with others in your organization. You are given the option to share this dataset with others; but don’t worry too much about your choice for now, you can manage permissions for datasets later.
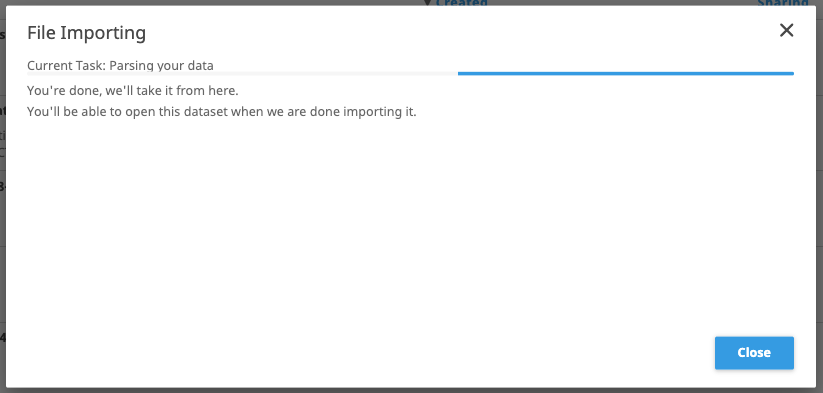
You are done setting up your import job! You can close this screen and continue working in SpatialKey while the upload completes.
Updating or appending to an existing dataset
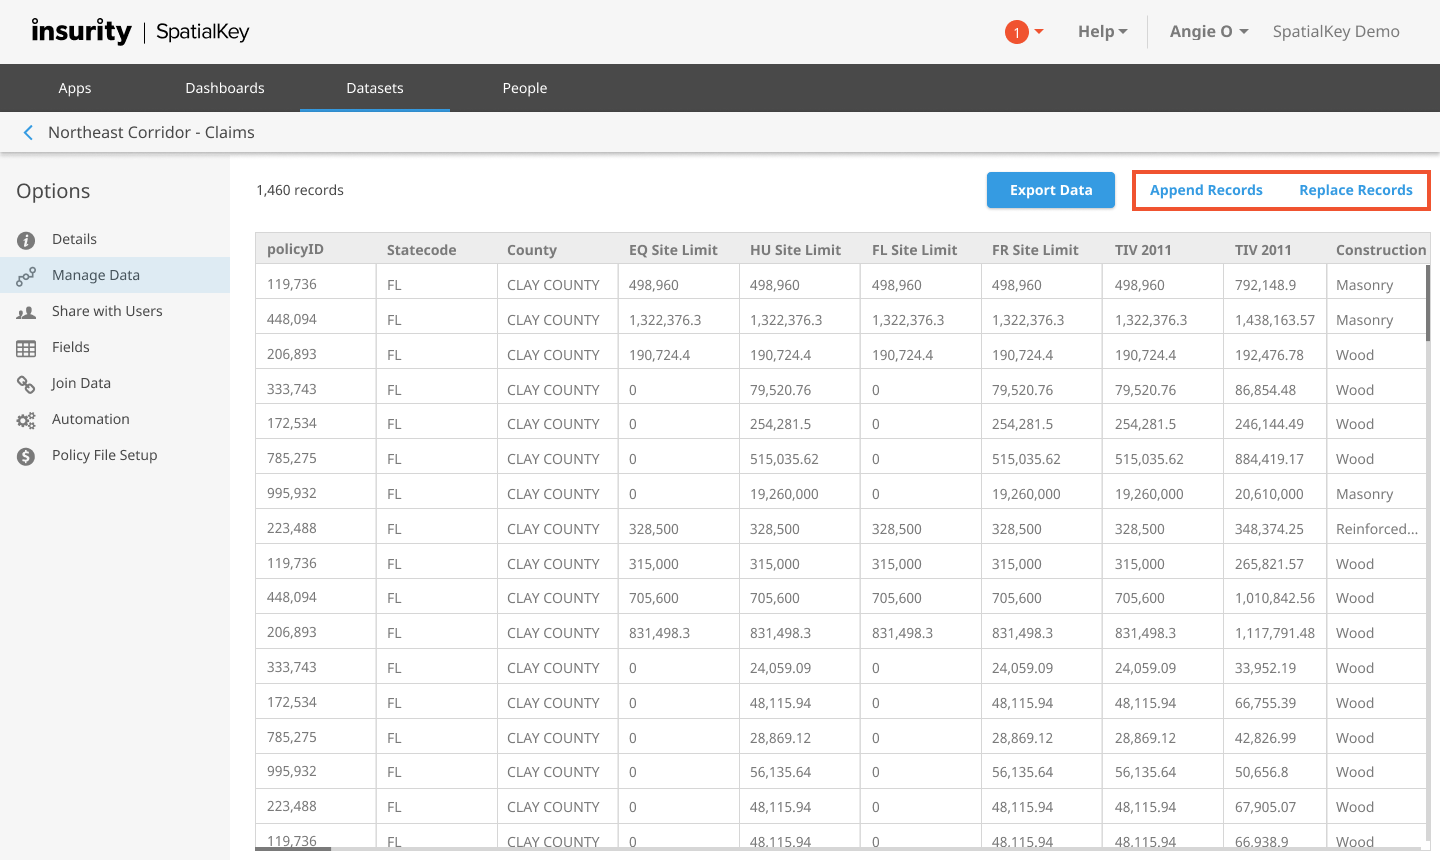
Upload a new version of your data or append additional records to your data from the Datasets tab. Click on the gear icon to view data settings and select the “Manage Data” option on the left side of the screen. Sure you could just import your new dataset again without using this feature, but you would have to reapply permissions, filters and joins, and recreate dashboards for the new dataset. Using the replace data or append data features will allow you to preserve any action that was taken on your dataset, saving you a lot of time!
Replace or append to an existing dataset:
When changing an existing dataset, you have the option to replace or append to the existing dataset. Note that for shapefiles, the only option is to replace.
After selecting to “Append more data” or “Replace all data”, you will have a chance to preview the data in the selected file before the upload begins. All settings from the original upload of the file will be applied to the new dataset.