Attaching a policy dataset to a location dataset (that is already imported into SpatialKey) will allow you to use the dataset to calculate exposed limits or gain perspective and answer targeted questions about exposures in your portfolio. If you don’t have a dataset ready for this but still want to follow along with an example, you can download sample date here (Download Sample Datasets – Locations + Policy Files).

To learn more about how the financial model works inside SpatialKey, check out our Financial Modeling Quick Start Guide.

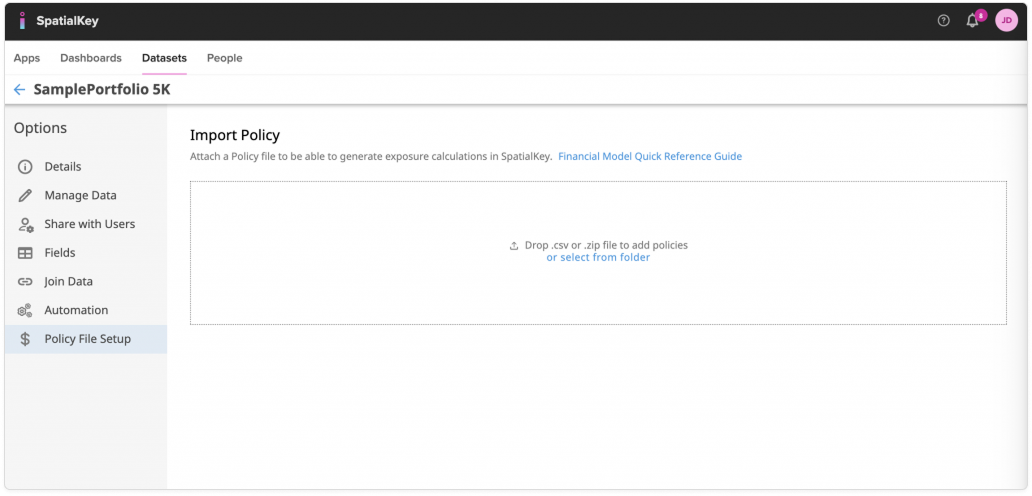
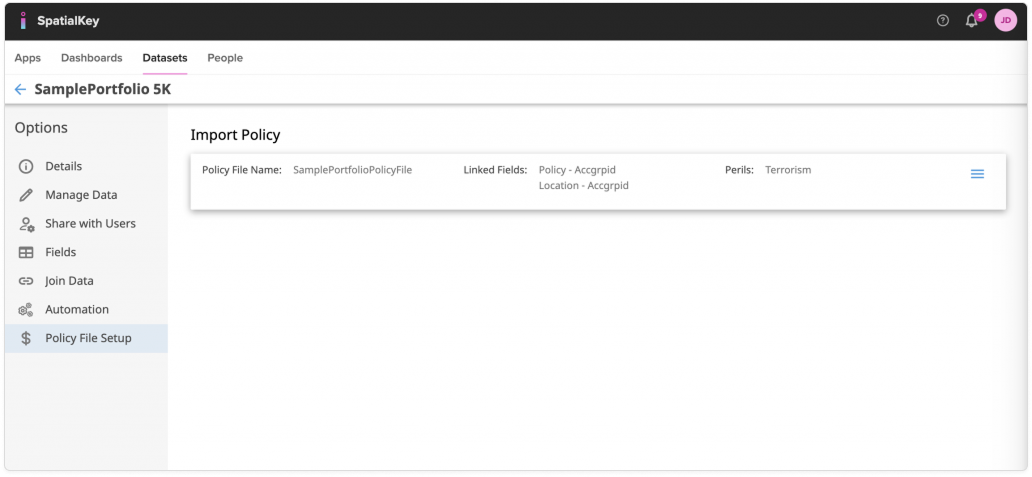
To begin, select the Datasets tab and find your dataset. Click on the gear icon to view data settings and select the “Policy File Setup” option on the left side of the screen.

Drag your policy file in or click “select from folder” to select and import your policy dataset. Note that only dataset Creators/Editors can attach a policy file.

Image of the SpatialKey dataset Policy File Setup page showing the Import Policy section. The main area displays a large upload area prompting users to drag and drop a CSV or ZIP file or select one from a folder to attach policy files. A link to the Financial Model Quick Reference Guide appears above the upload area. The left navigation highlights Policy File Setup, indicating where users configure policy data used for exposure calculations.

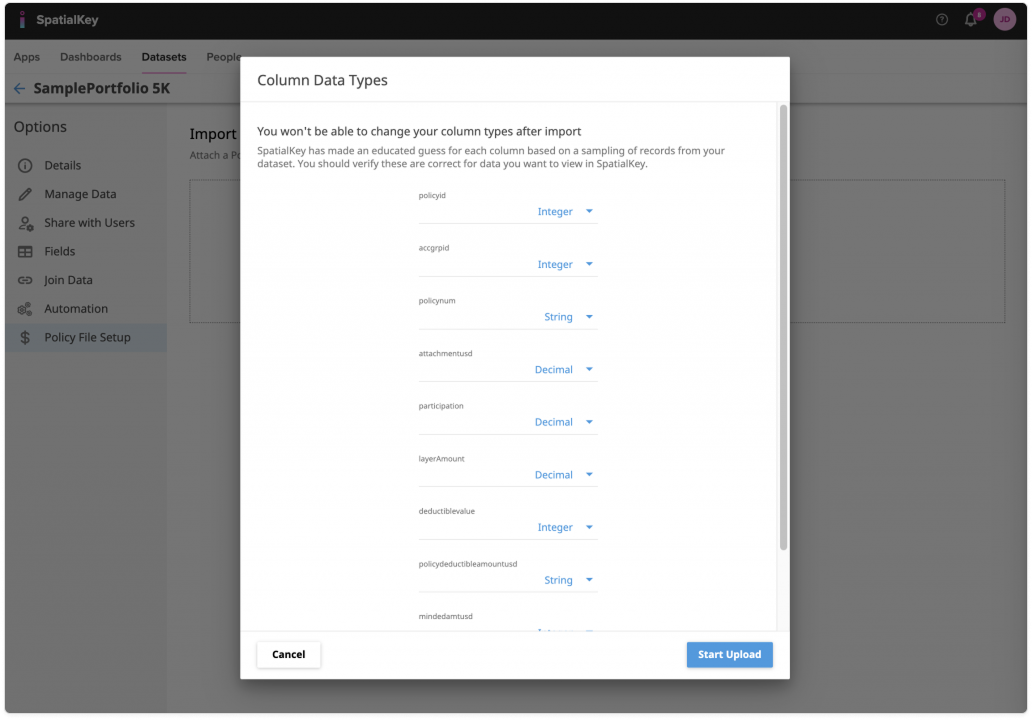
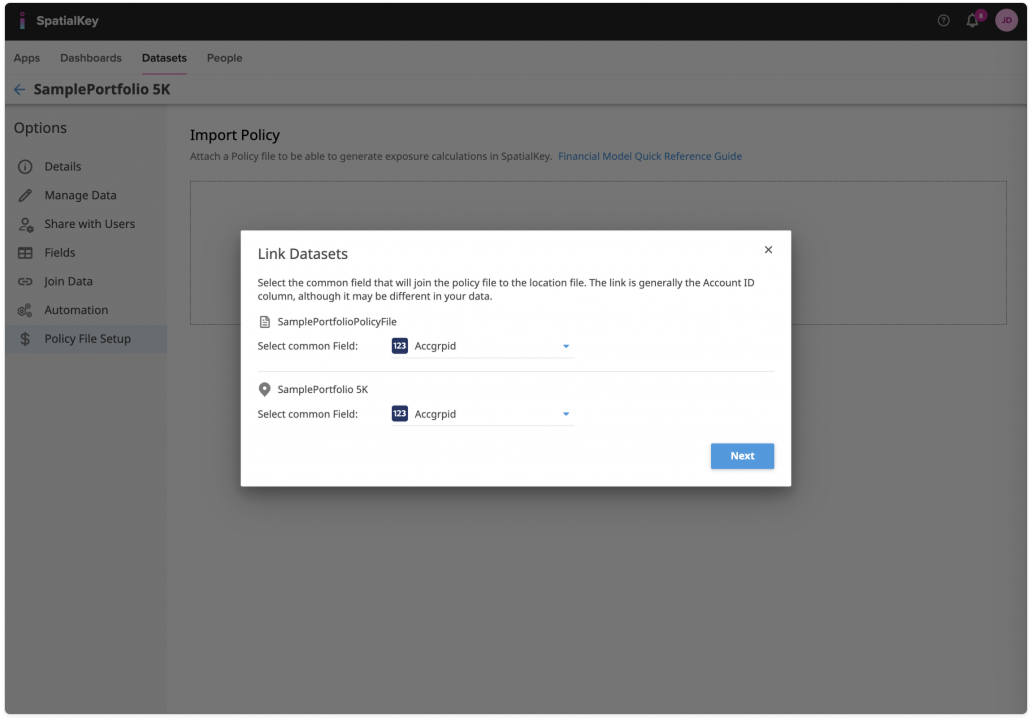
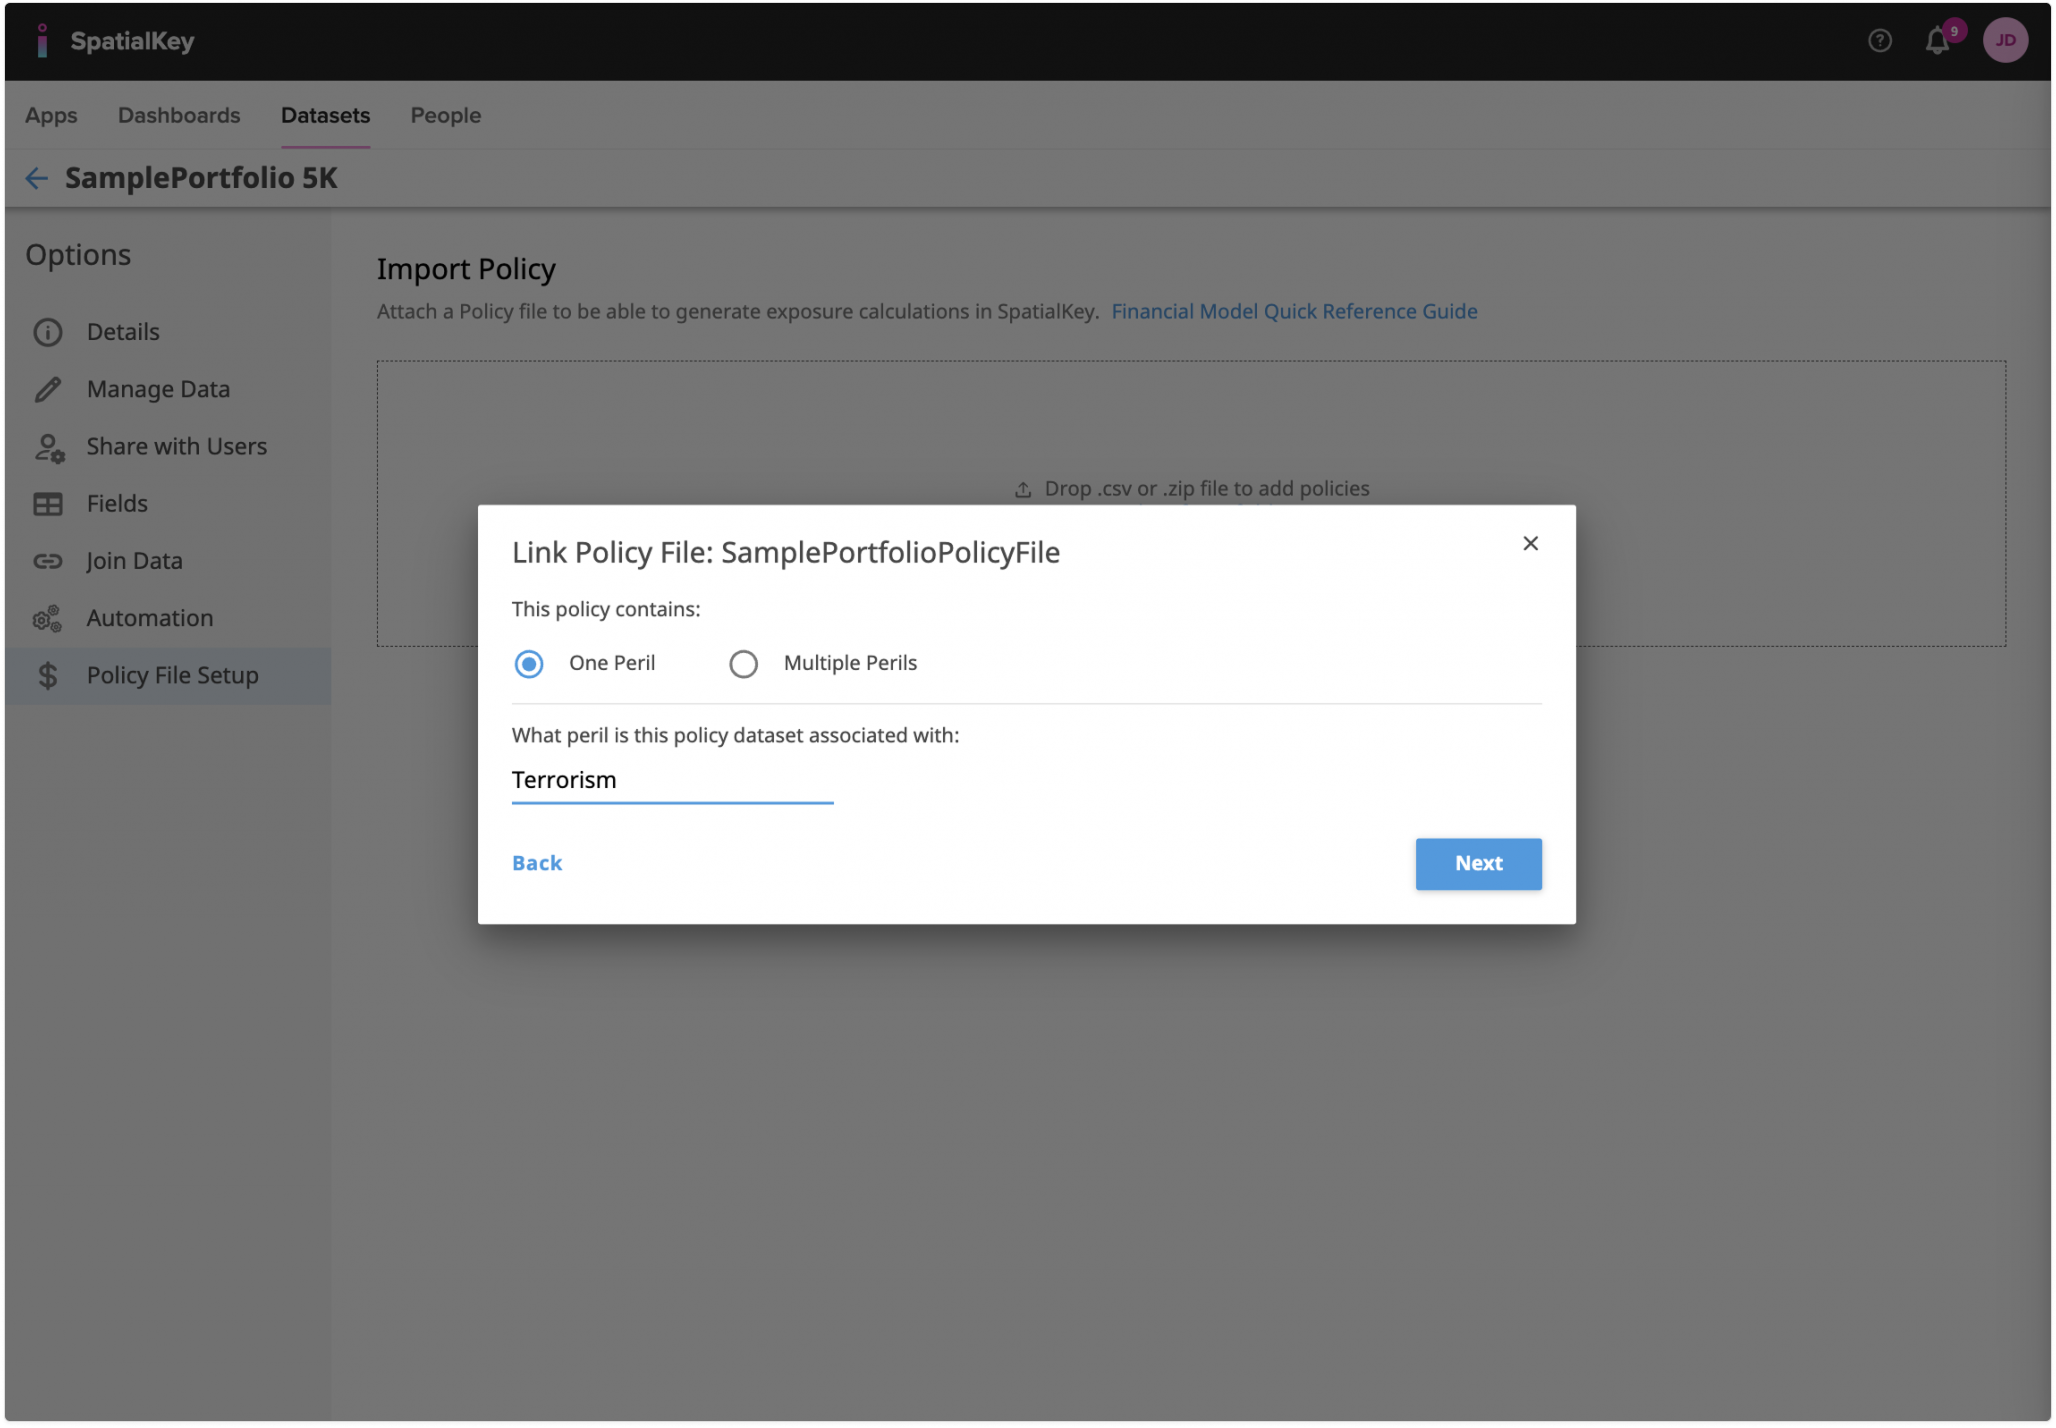
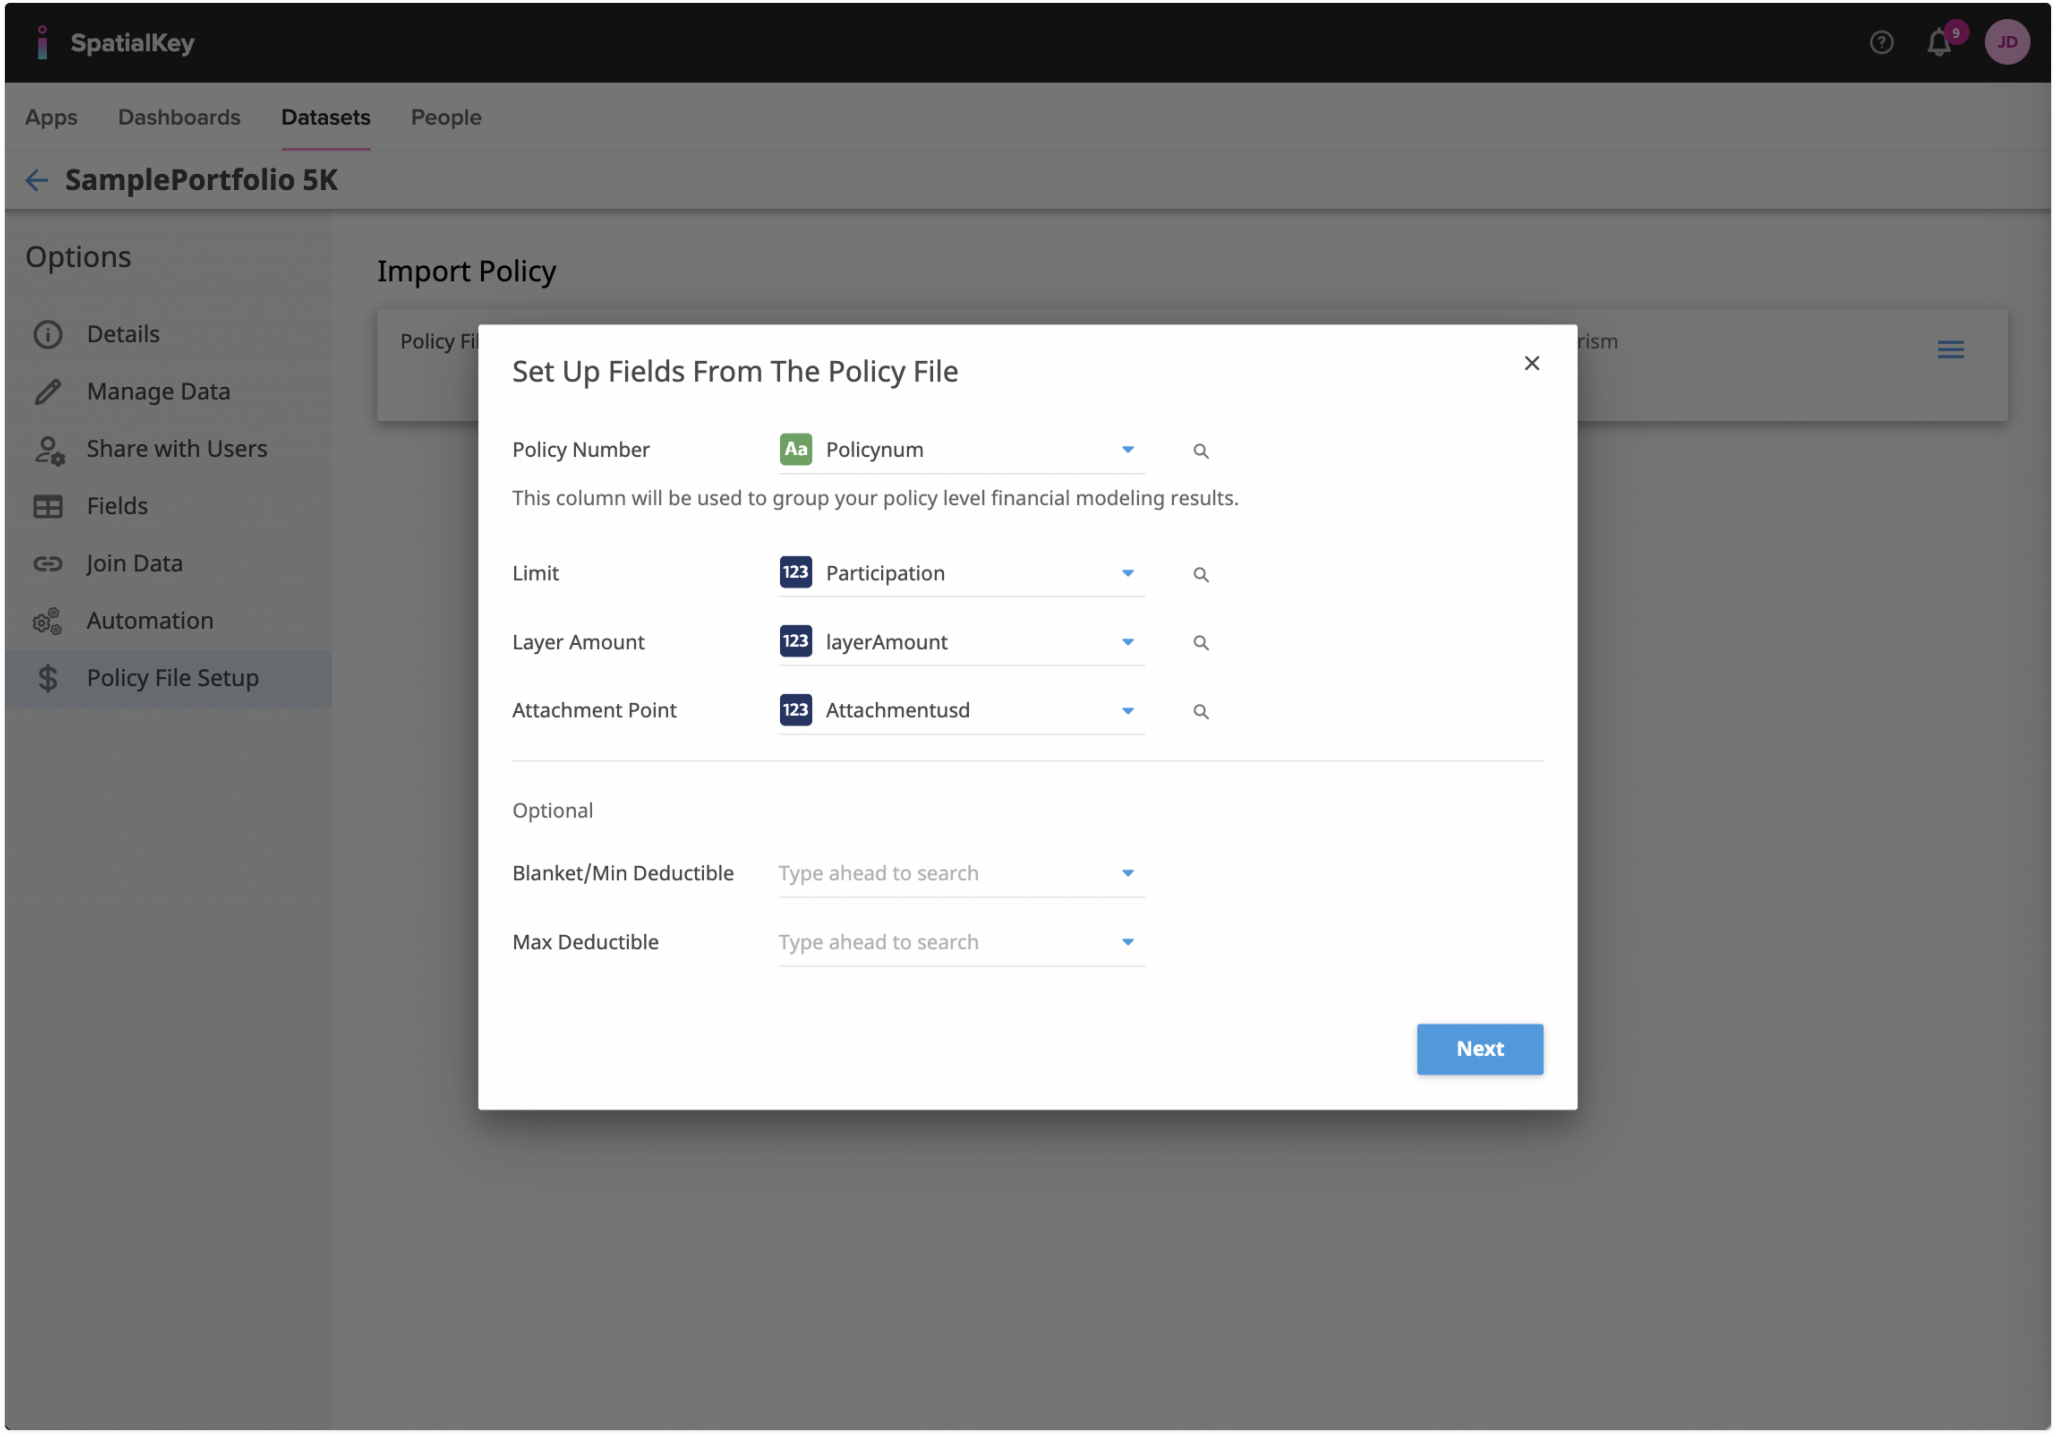
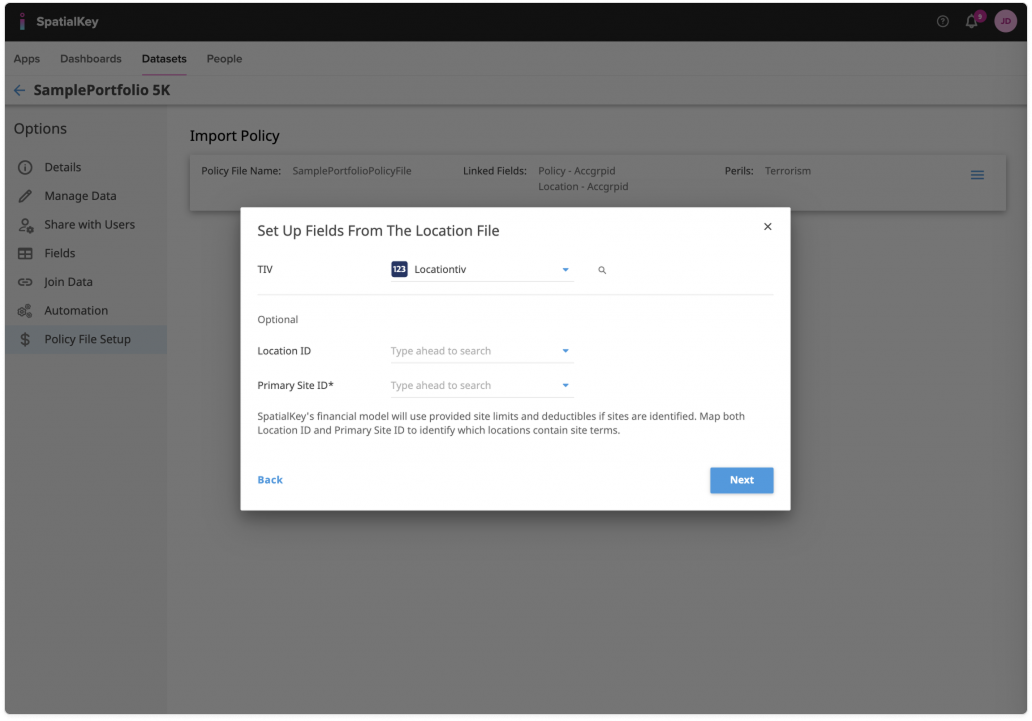
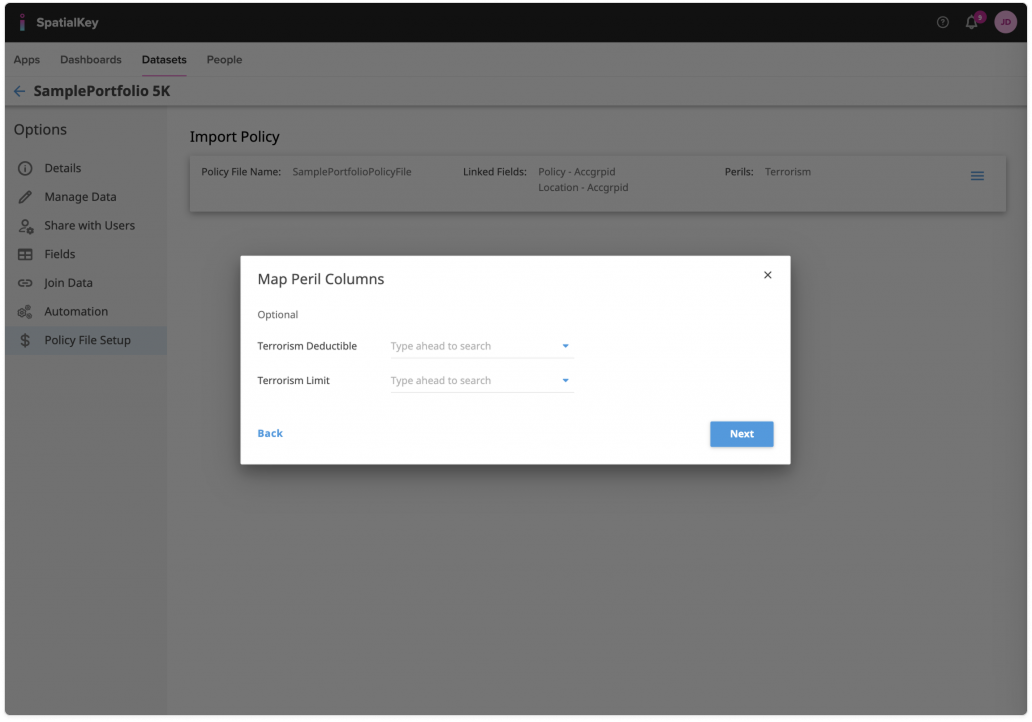
You will be guided through a setup wizard that will allow you to preview the policy data and link it to your locations, and then map important fields to enable policy exposed limit calculations.

Image of a SpatialKey modal titled ‘Column Data Types’ displayed during the policy file import process. The modal lists multiple policy-related fields with dropdown menus to review or adjust each column’s data type—such as Integer, String, or Decimal—before uploading. Informational text explains that column types cannot be changed after import. A Cancel button appears in the lower-left corner and a Start Upload button in the lower-right, while the Policy File Setup page is visible but dimmed in the background.
Step 1: Column Data Types
Image of the SpatialKey Policy File Setup workflow with a centered modal titled ‘Link Datasets.’ The modal shows dropdown fields for selecting a common field to link a policy file dataset with the SamplePortfolio 5K location dataset, using an identifier such as Accpgrid. Instructional text explains that the selected field is used to join policy data to location data. A Next button appears in the lower-right corner, while the underlying Import Policy page is dimmed in the background.
Step 2: Link Datasets by selecting a common column
Image of the SpatialKey Policy File Setup workflow with a modal titled ‘Link Policy File: SamplePortfolioPolicyFile.’ The dialog prompts the user to specify whether the policy file contains one peril or multiple perils, with One Peril selected, and to identify which peril the dataset is associated with, shown as Terrorism. Back and Next buttons appear at the bottom of the modal, while the Import Policy page is dimmed in the background, indicating a step in the policy‑to‑dataset linking process.
Step 3: Identify your peril(s). If only 1 peril (e.g., hail, wind, terrorism), give it a name. If you have multiple in your policy file, select the column from your data that identifies them.
Image of the SpatialKey Policy File Setup workflow with a modal titled ‘Set Up Fields From The Policy File.’ The dialog shows required field mappings for policy number, limit, participation, layer amount, and attachment point, along with optional deductible fields. Each row includes a dropdown to select the corresponding column from the uploaded policy file, illustrating how users configure financial modeling inputs before completing the import. A Next button appears in the lower-right corner, with the Import Policy page dimmed in the background.
Step 4: Set up policy file fields
Image of the SpatialKey Policy File Setup workflow with a modal titled ‘Set Up Fields From The Location File.’ The dialog shows required and optional field mappings, including TIV mapped to a location value field, along with optional fields for Location ID and Primary Site ID. Instructional text explains how these identifiers are used in SpatialKey’s financial model to associate site limits and deductibles with locations. Back and Next buttons appear at the bottom of the modal, while the Import Policy page is dimmed in the background, indicating a step in configuring location-based policy data.
Step 5: Set up location file fields
Image of the SpatialKey Policy File Setup workflow with a centered modal titled ‘Map Peril Columns.’ The dialog shows optional dropdown fields for mapping Terrorism Deductible and Terrorism Limit from the policy file, allowing users to associate peril-specific financial values with the dataset. Back and Next buttons appear at the bottom of the modal, while the Import Policy page is dimmed in the background, indicating a final configuration step in the policy file setup process.
Step 6: Optionally set up your peril column mapping (e.g., deductibles and limits per peril)
Image of the SpatialKey Policy File Setup workflow with a modal titled ‘Review Policy Exposed Limit Setup.’ The dialog summarizes configuration details for both the policy file and location file, including mapped fields for policy number, limits, layer amount, attachment point, TIV, and optional deductibles and peril limits. Edit links appear next to each section, allowing users to revise settings before finalizing. A Save button appears in the lower-right corner and a Back link in the lower-left, while the Import Policy page remains dimmed in the background, indicating the final review step before saving the policy setup.
Step 7: Review your setup

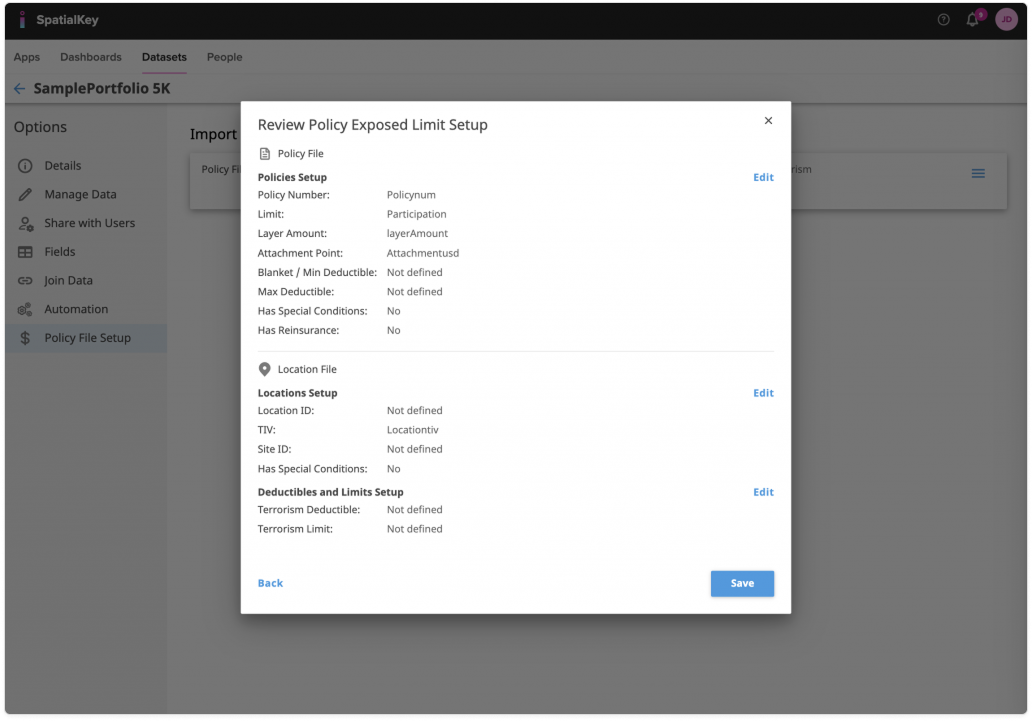
When the setup is complete, the screen will update to show information from the policy file and provide you with the option to manage the policy file or policy exposed limit setup.

Image of the SpatialKey Policy File Setup page showing a completed Import Policy summary bar. The summary displays the policy file name, the linked fields used to join policy and location data, and the associated peril (Terrorism), confirming that the policy file has been successfully configured and attached to the dataset. The left navigation highlights Policy File Setup, indicating this is the final state after completing the policy import workflow.

Was this helpful?

Yes

No


Thanks for your feedback!

Tagged: