
Easily collaborate and share dashboards across your organization to ensure seamless communication. This article explains how to save dashboards and share them with others in your organization. Learn the difference between Save and Save As, how to manage dashboard ownership, and how sharing a dashboard also grants appropriate access to the underlying data for seamless collaboration.
- Save in Analyst
- Save in Event Response
- Save in Accumulations
- Save in Underwriting
- Sharing Dashboards
- Exporting Dashboard Content
- How to Take a Screenshot on a PC
Save in Analyst
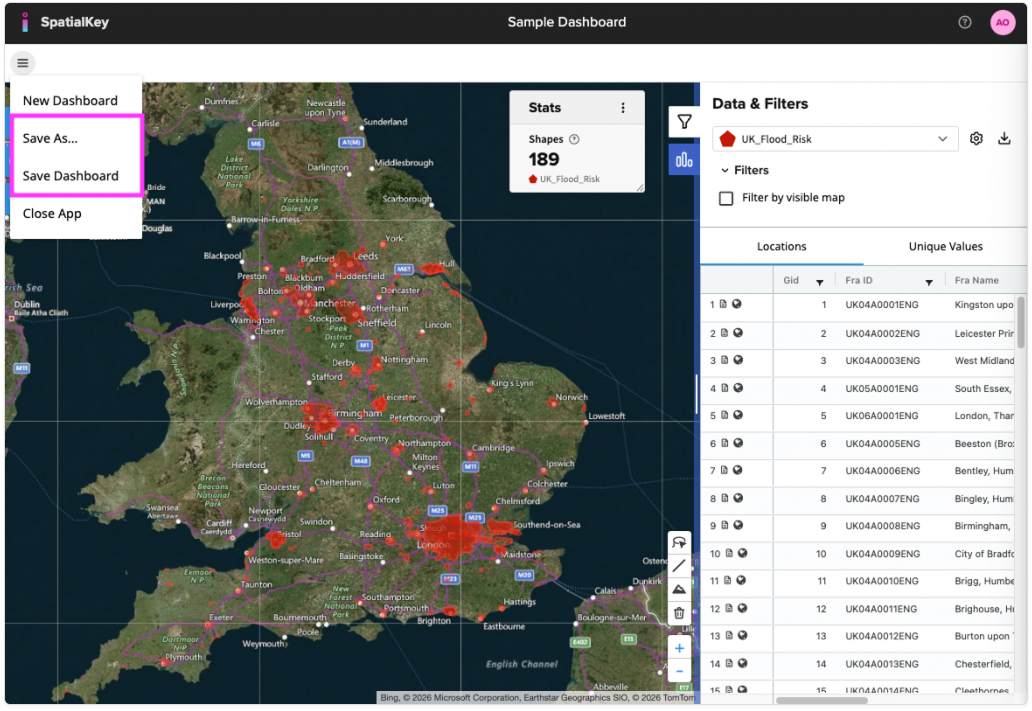
- “Save As” lets you clone an existing dashboard by creating a new copy without overwriting your original. Note: the “Save As” feature is only available in the Analyst application currently.
- “Save Dashboard” will save the existing dashboard and overwrite anything that was previously saved. Note: the “Save Dashboard” feature is only available in the Analyst and Event Response applications currently.
Saved Analyst dashboards are automatically set to never expire.
Save in Event Response
Dashboards in Event Response are automatically saved when the analysis is first run. By default, Event Response dashboards expire after 90 days. The expiration resets whenever you open a dashboard. You can also set your dashboard to never expire by editing the expiration in your dashboard settings.
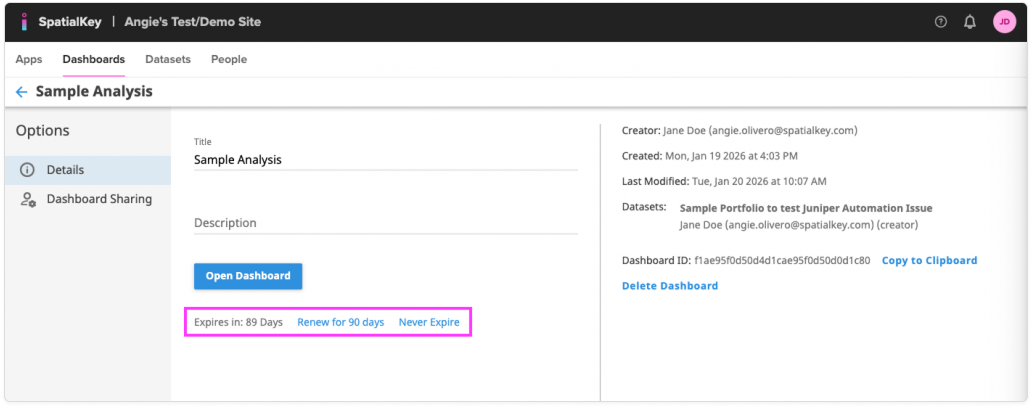
If you make changes to your dashboard, you can choose to manually save it by selecting “Save Dashboard” from the hamburger menu. Any dashboards you explicitly save will automatically be set to never expire. Please note that Event Response does not currently support a “Save As” option.

There is also a helpful Save as Template feature available in Event Response. Learn more in the Event Response Dashboard Template article.
Save in Accumulations
Dashboards in Accumulations are automatically saved when the analysis is first run, and they never expire. Currently, Accumulations does not support manually saving dashboards or using a “Save As” option.
Save in Underwriting
Dashboards in Underwriting are automatically saved when the analysis is first run. By default, Underwriting single lookups expire after 5 days and schedules expire after 90 days. This default may vary by organization. Contact us if you would like this default changed. The expiration resets whenever you open a dashboard. Currently, Underwriting does not support manually saving dashboards or using a “Save As” option.
Sharing Dashboards
There are two basic permission levels for sharing dashboards: viewers and owners. Dashboard viewers can view and interact with the dashboard, but they cannot save over the dashboard. Only dashboard owners can save over the dashboard.
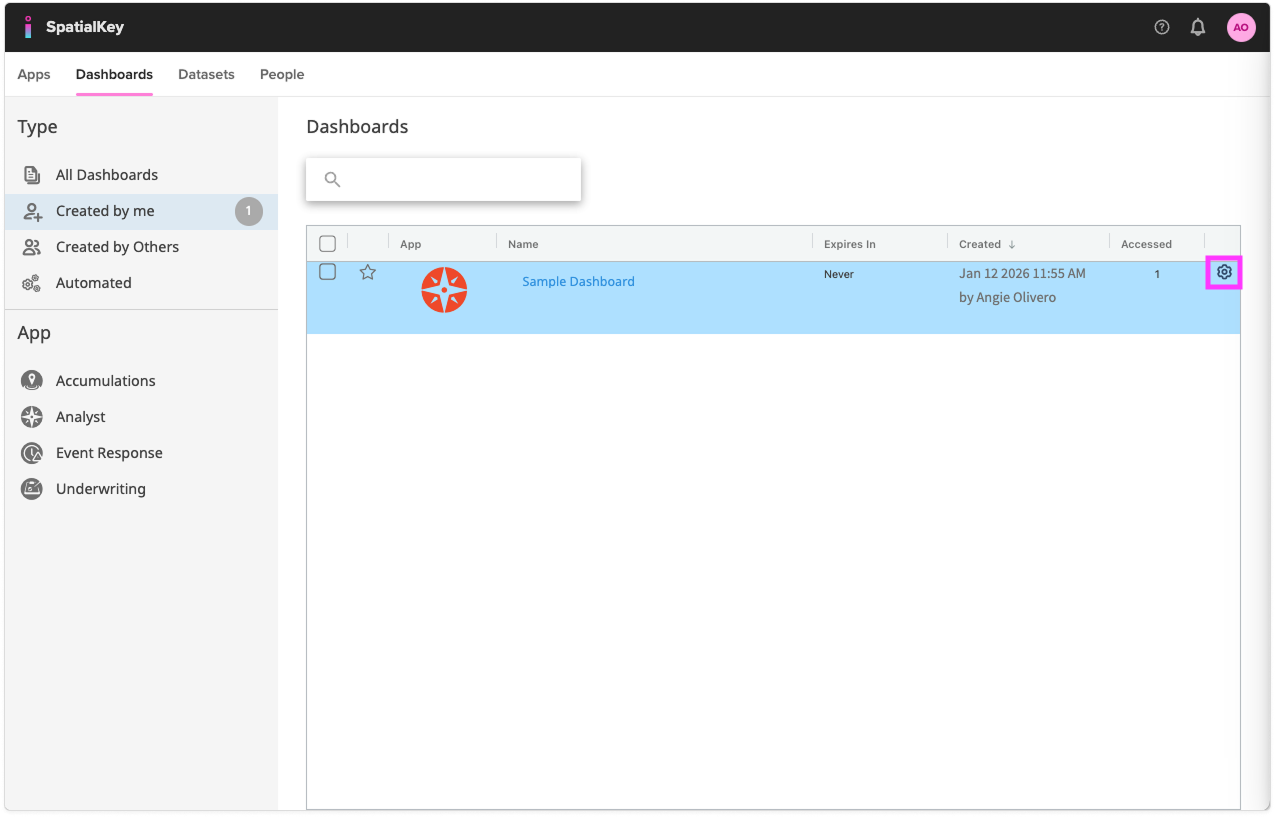
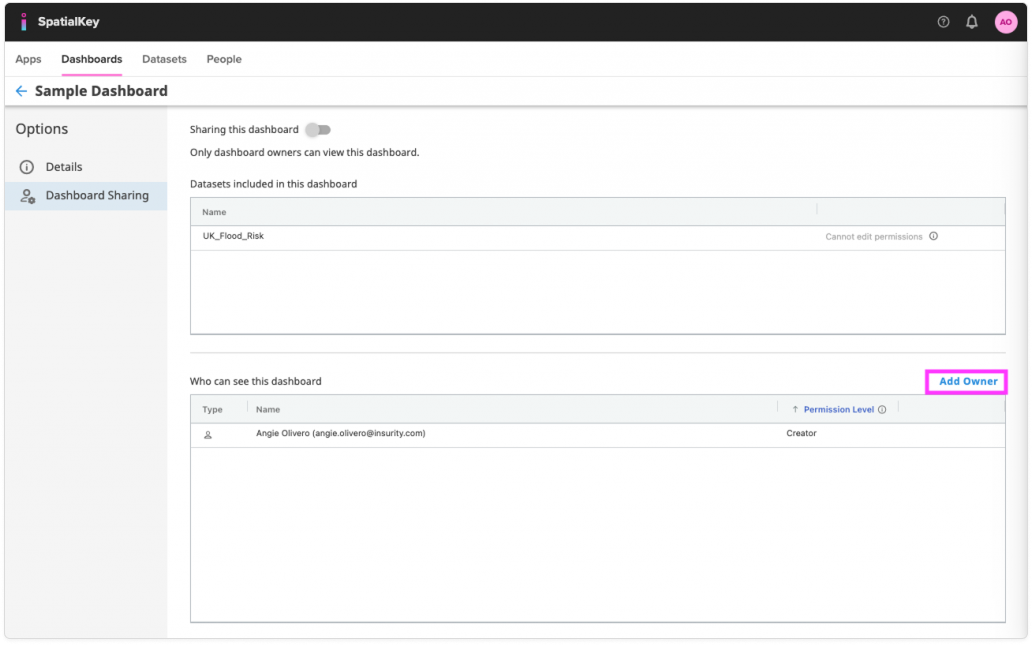
To access a list of your dashboards, open the Home interface and select the Dashboards tab. Find the dashboard you want to share, then click the settings icon next to its name to open the Dashboard Sharing options.
Sharing dashboards with viewer access is a simple two-step process
- First, a user must have access to ALL datasets included in the dashboard – see the Sharing Data article for details on how to share a dataset. If a user does not have access to ALL datasets included in the dashboard, they will not be able to view the dashboard.
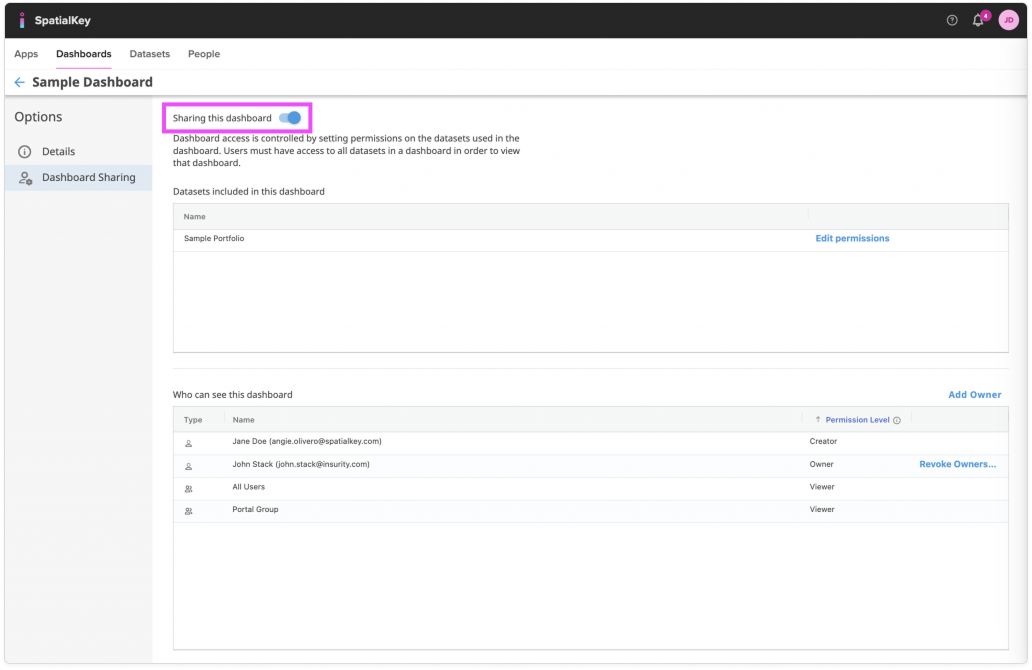
- Second, users need access to the dashboard. Viewer permissions can be turned on by enabling the “Sharing this dashboard” toggle. Any user who has access to the underlying data will be able to view the dashboard.
Dashboard owners
To give users permission to edit a dashboard, open the Dashboard Sharing screen and select ‘Add Owner.’ You’ll then see a list of users and groups that can be assigned as owners.
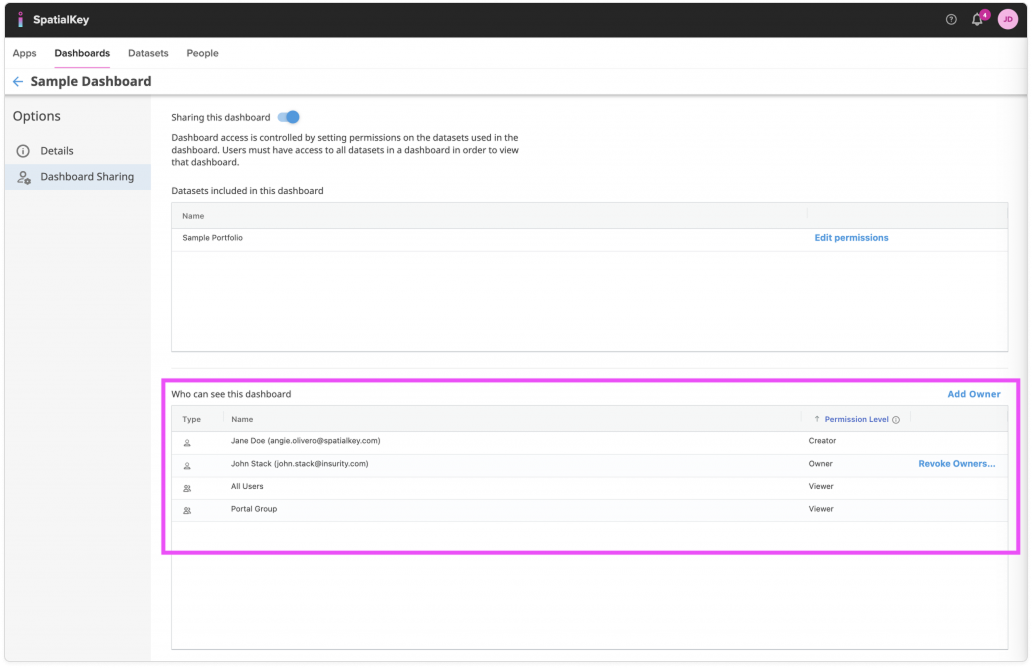
Adding an owner allows you to select specific users or groups and give them access to your dashboard and your underlying data all in one step. Anyone who didn’t already have access to the underlying data will be given Viewer permissions on the data.
Whether you chose to share with viewer or owner permissions, shared dashboards will show for those users in their Dashboard tab.
If you don’t see a dashboard in your list that someone else created, it likely hasn’t been shared with you yet. You’ll need to contact the owner, since you can’t view or manage sharing settings for dashboards you don’t already have access to.
Who can see the dashboard?
On that same Dashboard Sharing screen, you can quickly see who has access to the dashboard. Look for the section labeled ‘Who can see this dashboard’ near the bottom of the page. Both viewers and owners will appear in this list.
To remove viewers, turn off the “Sharing this dashboard” toggle. To remove an owner, click “Revoke ownership” next to their name.
Exporting Dashboard Content
Dashboards themselves cannot be exported, but you can take screenshots for use in presentations or documentation (see the screenshot section below for more details). The analyses and data within a dashboard can be exported, however. Below is a breakdown of what you can export from a dashboard.
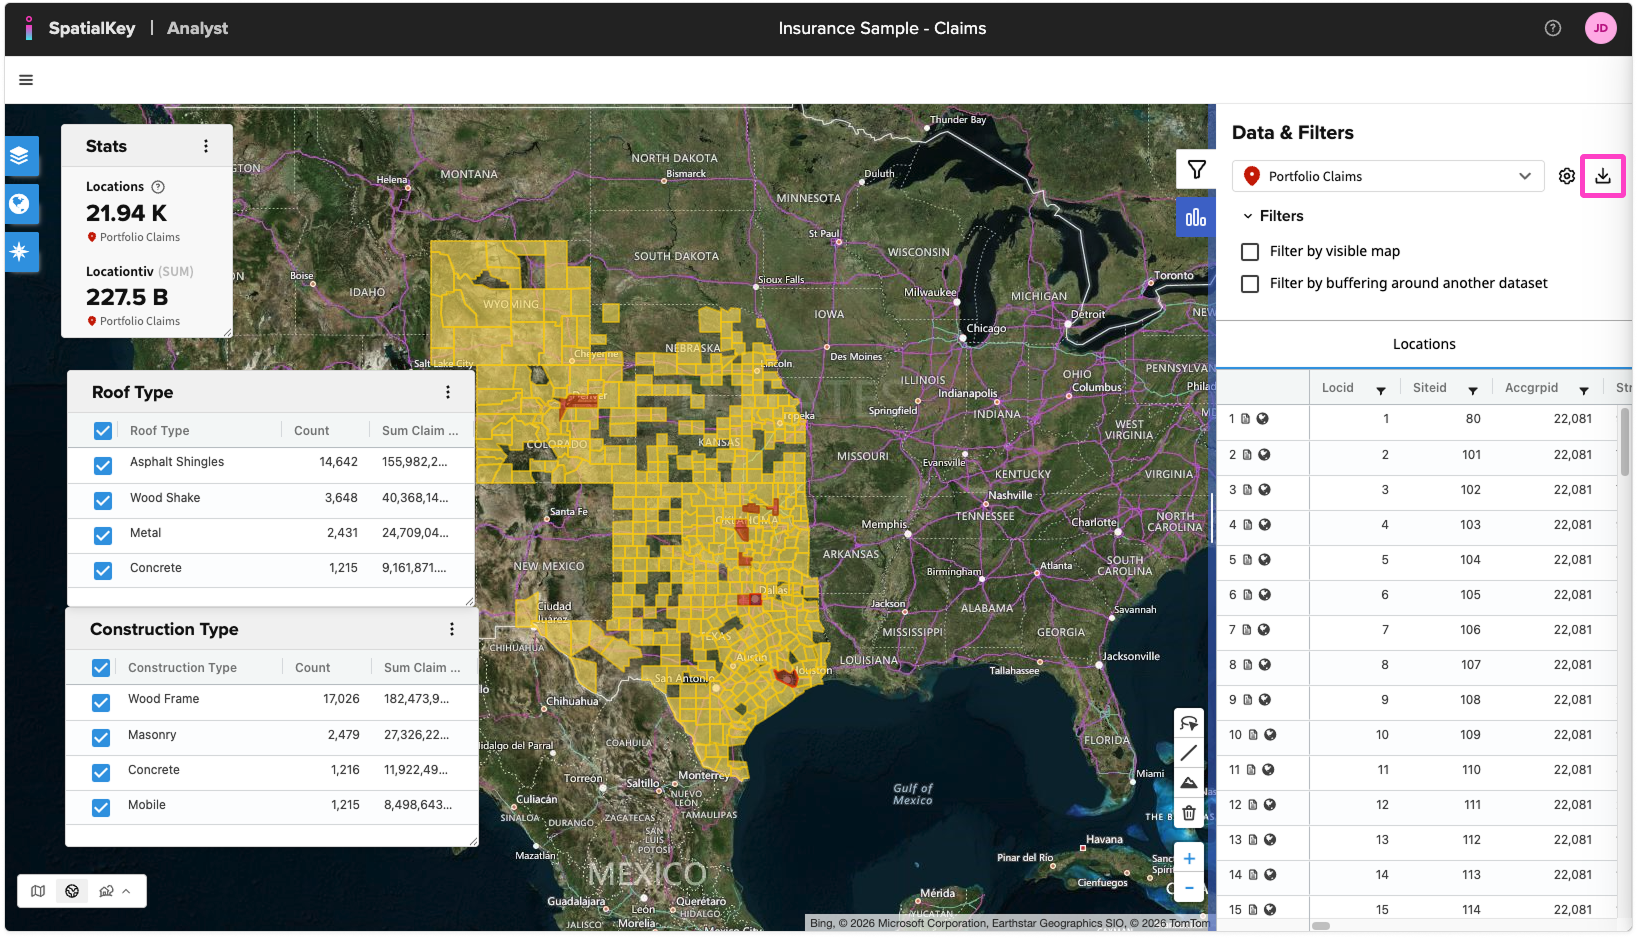
Analyst – You can download any of your data in an Analyst dashboard by clicking the Download button next to the name of the dataset in the List View. This export feature is global to all applications.
Accumulations – In addition to being able to download any dataset within an Accumulations dashboard, you can also export a CSV list or shapefile of the accumulation areas. With our Advanced Export option, you can download a list of accumulation areas, a list of impacted locations per area and a list of impacted policies per area (if applicable). Learn more about visualizing and understanding Accumulation results.
Event Response – In addition to being able to download any dataset within an Event Response dashboard, you can download a ZIP file of impacted locations & policies enhanced with hazard information along with the shapefile event footprint data. Learn more about visualizing and understanding Event Response results.
Underwriting – In addition to downloading any dataset within an Underwriting dashboard, you can also export a Summary Report PDF for an overview of all schedule locations, any individual Location Report PDFs to keep a record of newly written risks, or the List Report as both a CSV or PDF. Learn more about visualizing and understanding Underwriting results.
How to Take a Screenshot on a PC
To take a screenshot on a Windows PC, press the Print Screen (PrtScn) key to capture your entire screen. This copies the image to your clipboard, and you can paste it into a document or email using Ctrl + V. If you want to capture only the active window, press Alt + PrtScn. For more control—such as selecting a specific area—press Windows + Shift + S to open the Snipping Tool overlay, then drag to select the part of the screen you want to capture. The screenshot will be saved to your clipboard and can also appear in your “Screenshots” folder depending on your Windows settings.
Was this helpful?