
Let’s cover the different ways to bring data into SpatialKey so it’s ready for analysis. Learn how to upload files, import datasets from the Data Mart, add underwriting schedules, or use our Import APIs, Command Line Tool and Bridge ETL—so you can get your data in, mapped, and working quickly.
First, you’ll need to get your data into the right format (e.g. CSV, Excel, GeoJSON, Shapefile, KML, etc.), no data model required. Check out these articles to best prepare your data: learn what type of data works best in SpatialKey and best practices for preparing your data.
Once that’s complete, you are ready to import your data into SpatialKey. Here’s what we’ll cover in this article:
- Import Wizard (the easiest way to get started)
- Data Mart
- Underwriting Schedules
- Import API
- Command Line Tool
- Bridge
| Don’t have data handy? Check out our Sample Data |
Import Wizard
On the Datasets tab, click on the “Add New Dataset” button and select the “Upload Dataset” option.
Next, you’ll be taken through a few steps to identify the information in your dataset like geography, location fields, geocoding options, column types, creating a title and setting up sharing options.

The Data Upload Wizard will walk you through a few steps that will help SpatialKey learn about your data and how to plot it on a map.
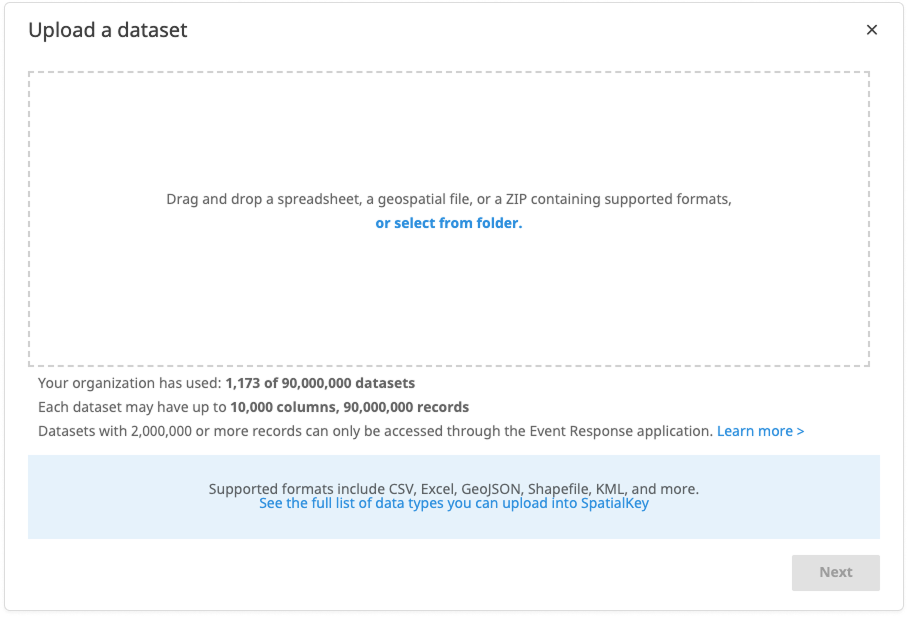
The first screen contains links describing what files types are supported for upload and also displays your organization’s limits, so you know how many records and columns are allowed for each dataset. Drag your file into the window or select a file from a folder to upload a dataset.
Importing a vector file: If the file you select is a vector file (e.g., GeoJSON, Shapefile, KML, etc.), you will automatically skip to the final screen to name your dataset, configure email notifications, and opt to share this dataset with everyone in your organization. Note: All vector files are converted to shapefile on import.
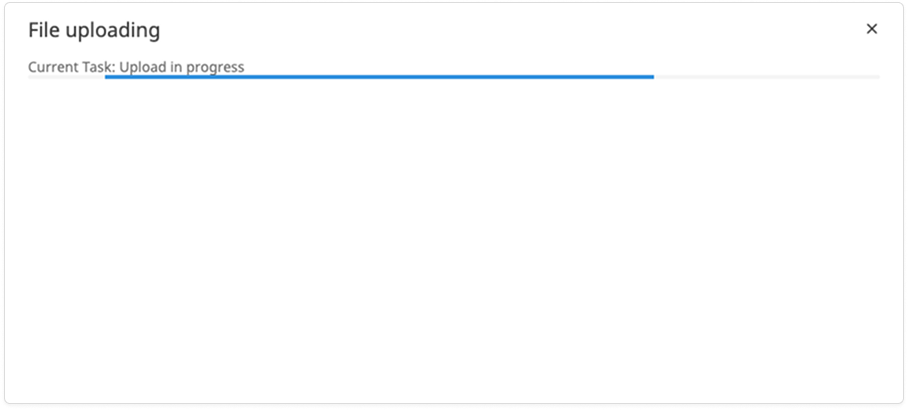
Importing a location dataset: Once you select your dataset, SpatialKey will perform an initial upload of the file, so we can read from the columns in future steps.
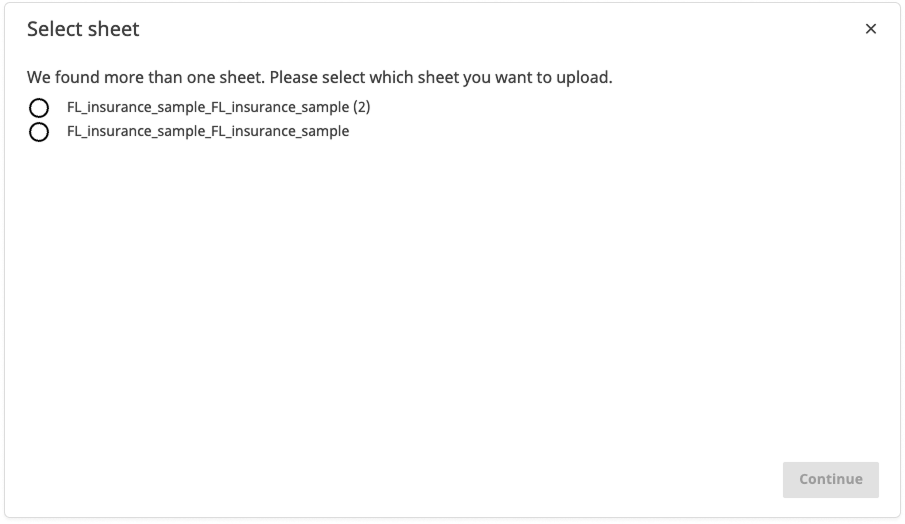
If the file you select is a ZIP containing multiple files or a spreadsheet with multiple tabs, you will be asked to choose a specific file or sheet in the next step. Otherwise, you will automatically continue to the next step. Note: all location datasets are converted to .CSV on import.
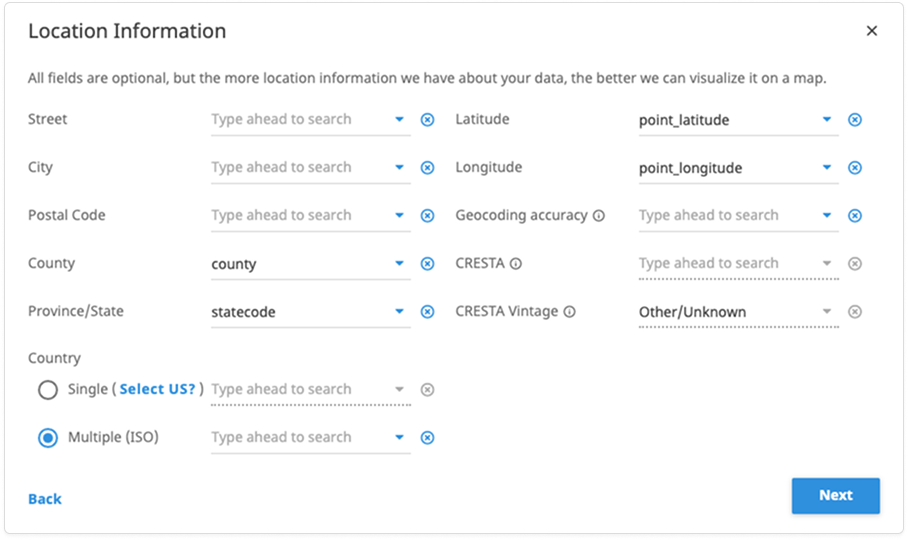
The next screen maps all your location data. SpatialKey will auto-detect most fields but check them over to make sure everything looks accurate. The more location information we have about your data, the better we can visualize it on a map.
On the geocoding screen you’ll see which geocoder is licensed for your organization and a confirmation as to whether you have enough geocoding credits. If your data is in the US, we’ll automatically provide thematic mapping for US Counties, Postal Codes and US States. With this information, you will be able to create thematic maps that show the distribution of a single metric by either state, county or postal code.

If you click the button to “Set Column Types” you’ll see how each field was detected. Most of your data will fall into one of three data types: String, Number or Date. Take the time to look over each column, what you choose here can have implications when viewing your data in a dashboard (e.g. you can only sum Numeric fields). Most data format types cannot be changed after your data has been imported into SpatialKey. However, there are a few exceptions: you can rename a column, and you can adjust the format of numeric fields—including adding a currency symbol when the currency format is selected.

Final Step
The final step is to name your dataset, request an email notification when the import completes, and opt to share this dataset with everyone in your organization. Part of the power of SpatialKey is being able to easily share and collaborate with others in your organization. You are given the option to share this dataset with others; but don’t worry too much about your choice for now, you can manage permissions for datasets later.

You are done setting up your import job! You can close this screen and continue working in SpatialKey while the upload completes. You’ll receive a notification in the SpatialKey header when your import is complete. If you also selected email notifications, you’ll be notified by email as well.

Updating or appending to an existing dataset
Upload a new version of your data or append additional records to your data from the Datasets tab. Click on the gear icon to view data settings and select the “Manage Data” option on the left side of the screen.


You could also import your new dataset again without using this feature, but you would have to reapply permissions, filters and joins, and recreate dashboards for the new dataset. Using the replace data or append data features will allow you to preserve any action that was taken on your dataset, saving you a lot of time!
Replace or append to an existing dataset:
When changing an existing dataset, you have the option to replace or append to the existing dataset. Note that for shapefiles, the only option is to replace.

After selecting to Append more data or Replace all data, you will have a chance to preview the data in the selected file before the upload begins. All settings from the original upload of the file will be applied to the new dataset.
Import from Data Mart
The Data Mart is a small catalog of datasets available for you to import into your datasets list so you can interact with it in SpatialKey.
The Data Mart feature mitigates the need for you to invest significant amounts of time in gathering hazard and event data yourself. Within the Data Mart, you can choose from an expanding selection of data and with one click have the data imported into your organization to begin analysis against your exposures.
The Data Mart currently contains both real-time and historical data from industry weather, event, and census data sources. Here are some of the thing that you will find in the Data Mart:
- NOAA SPC storm reports
- NOAA tropical storm/hurricane forecasts
- NOAA historical hurricanes
- NOAA historical tornados
- USGS earthquakes
- MODIS Wildfire perimeters
The Data Mart also enables you to easily add visual map overlays to your dashboards, like FEMA flood zones, precipitation, and cloud cover. This list will only continue to grow as we add more data sources and as you prepare your own data.
You can access the Data Mart via the Add New Dataset button on the Datasets tab.


Underwriting Schedules
Underwriters can enter individual locations or import a schedule (CSV only) directly in the Underwriting application.
The Underwriting application uses a dedicated import process that is separate from the Home interface and other applications. Datasets imported through the Home interface cannot be used in the Underwriting app; instead, schedules must be imported directly into Underwriting. This separation exists in part because Underwriting schedules do not count against the organization’s dataset quota and have significantly shorter expiration periods. Note that Underwriting only accepts .CSV files for import.
In-force portfolios used within Underwriting for aggregation analysis or as a visual reference should be imported through the Data Upload Wizard or via API in advance. Underwriters will be prompted to select that data for use in their analysis as part of their workflow.

Import & Data API
Our Import & Data APIs allow you to automate the import and management of data within SpatialKey, such as your portfolio. They provide a simple HTTP‑based interface that enables developers to programmatically create and update data in SpatialKey. Learn more
Command Line Tool
No programming knowledge? You can leverage our API to create and update data in SpatialKey with the Command Line Tool. Learn more
Bridge ETL
Bridge ETL is a user-friendly app that sits on your desktop and does the work of converting and uploading RMS EDM or AIR’s CEDE format for use in SpatialKey. Learn more
Was this helpful?