
| Note: This feature is available in SpatialKey Client for Windows applications, i.e., Map Analyst, Hazard Analyst and Accumulations. |
Use synchronized filters to filter multiple datasets with a single filter pod. Synchronized filters work in dashboards where multiple datasets have been added. Once a synchronization is set up, any filters applied to the selected dataset/column combination will also be applied to all other synchronized datasets.
Each dataset that is synchronized for filtering must have a column containing similar data. The data within the column must be of the same data type and contain similar information. E.g. if I want to synchronize two datasets on the State column, the datatype for both state columns needs to be text and the data should be similar – both two character state codes or full state names. If the state columns had different data styles (one with two character and one with full names) the synch would not filter correctly.
Using Synchronized Filters
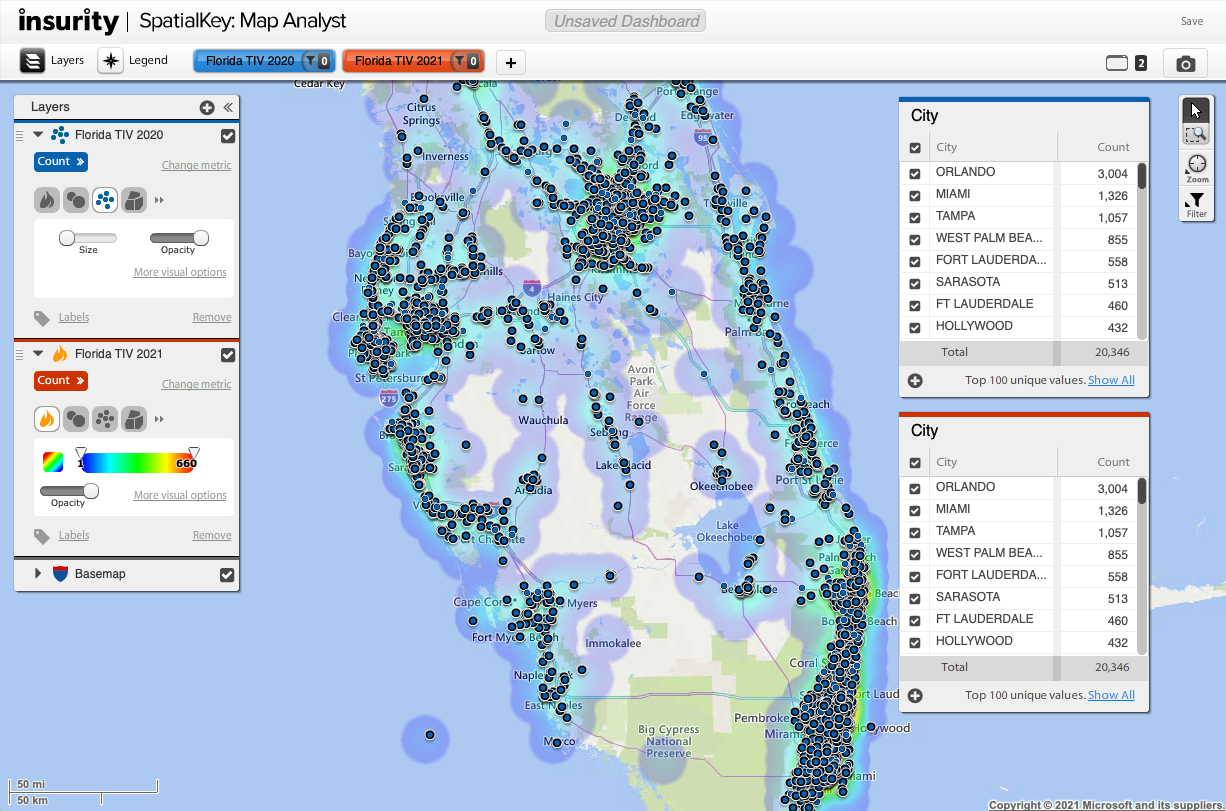
To illustrate the use of Synchronized Filters we will use an example using two datasets. Both datasets contain a column/field representing City.
Note that the names of the columns is not important to the creation of the Synchronized Filter but the data type of the column and the data within is. In this case, both datasets have similar city names with the “City” included in the name. If the “City” wasn’t included in the name of the city for one of the datasets, the synchronized filters wouldn’t work well because there were be no commonality between the data in the city columns.
If we wanted to filter both datasets to only the data contained in Orlando, we could use two filter pods (one for each dataset) and filter for only “Orlando” values. This certainly would work, but can become a hassle if you are wanting to change the selected city more than once, and would be a real pain point if you have many datasets in the report beyond the two here in this example. To simplify this process we will create a Synchronized Filter on the datasets’ city fields.
How To Setup a Synchronization
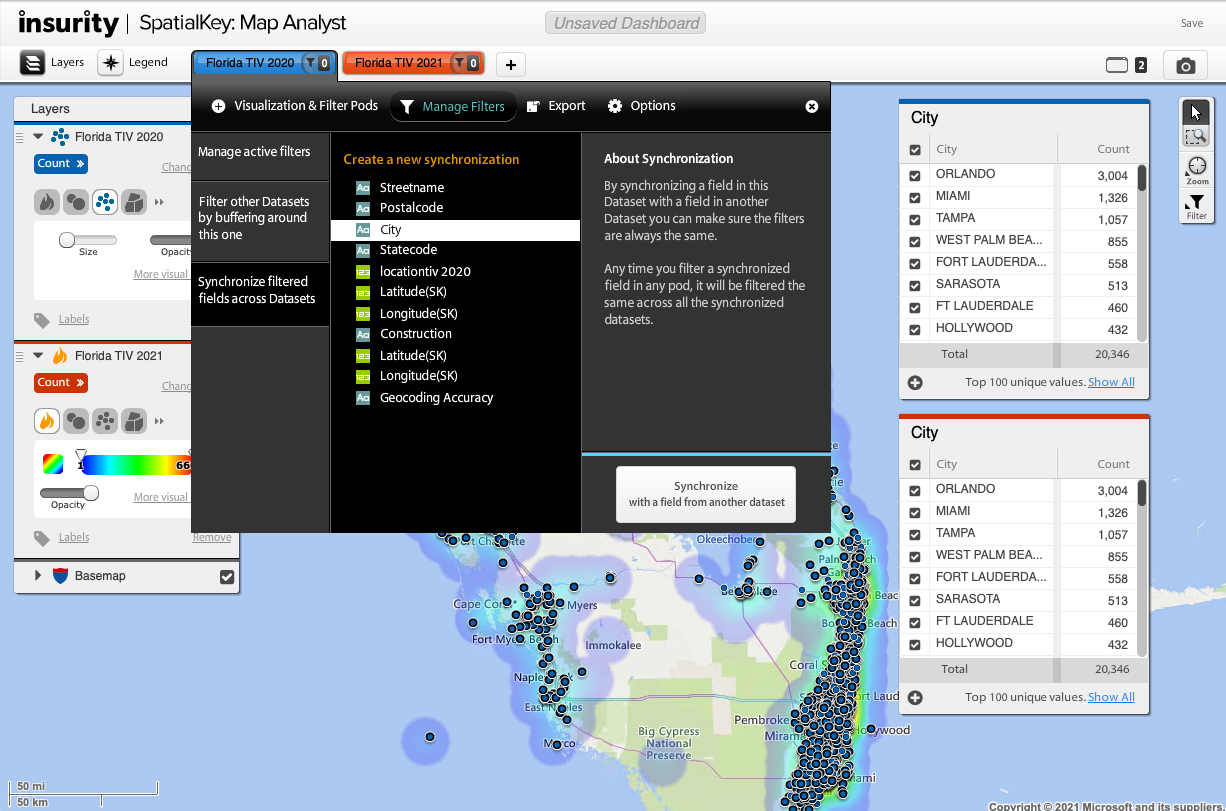
- Start by expanding the dataset configuration panel for one of the datasets you are trying to synch
- Click the “Manage Filters” tab of the dataset details screen
- Choose the “Synchronize filtered fields across Datasets” sub-section
- Choose the field to synchronize (in this case I am selecting City from the blue dataset)
- Click the “Synchronize” button
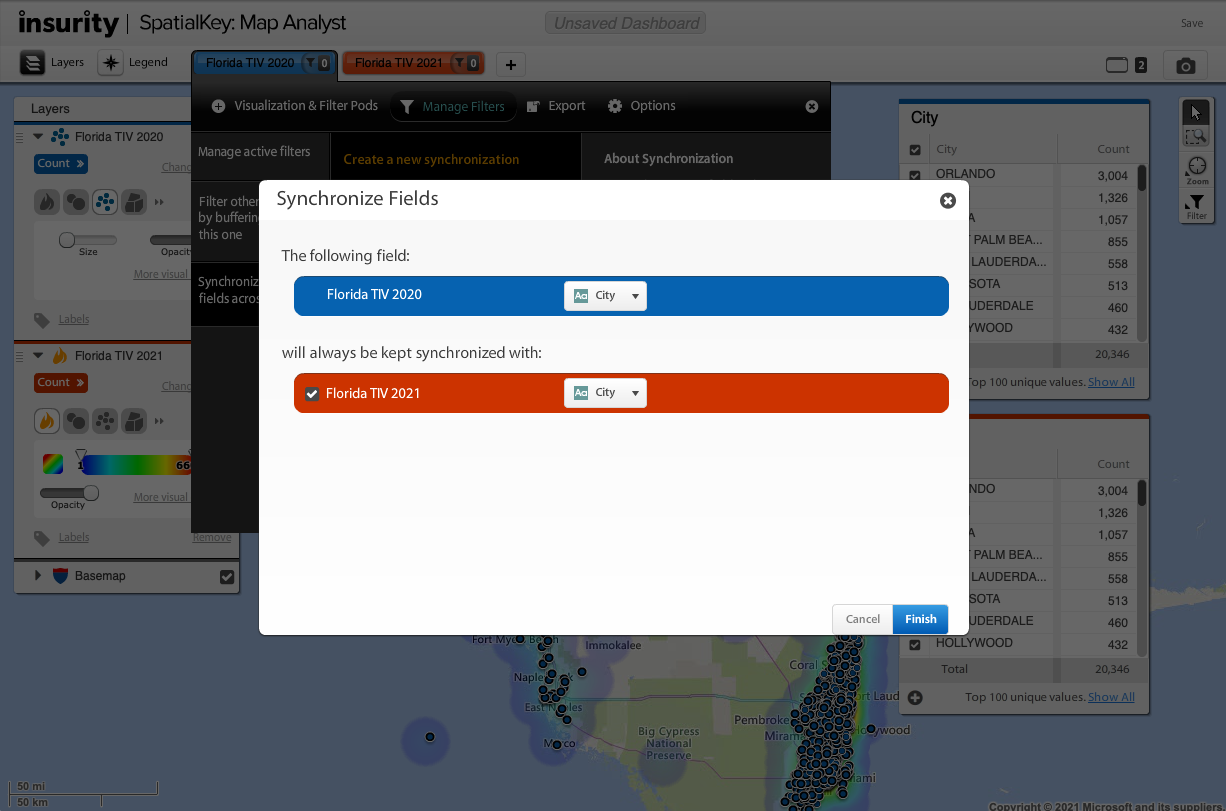
- The Synchronize Fields window appears with the initial selected dataset and field at the top
- Any other datasets in your dashboard will be displayed below the selected
- Select the dataset(s) to synchronize by checking/unchecking the checkboxes and choose the column/field for each dataset that matches the initial selection
- Click “Finish” when complete
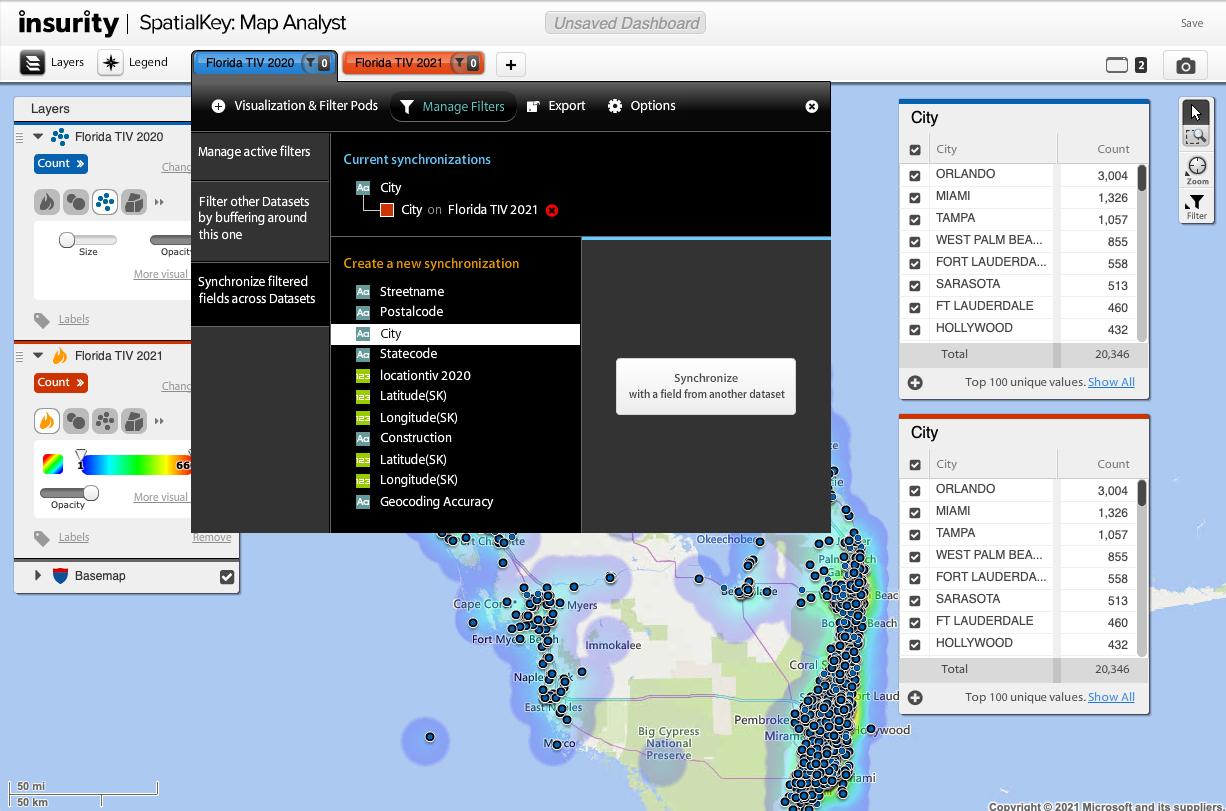
- The “Synchronize filtered fields across Datasets” screen now shows the current synchronization’s. Note the red X next to the synchronized dataset will allow you to remove the synchronization.
How to Use a Synchronized Filter
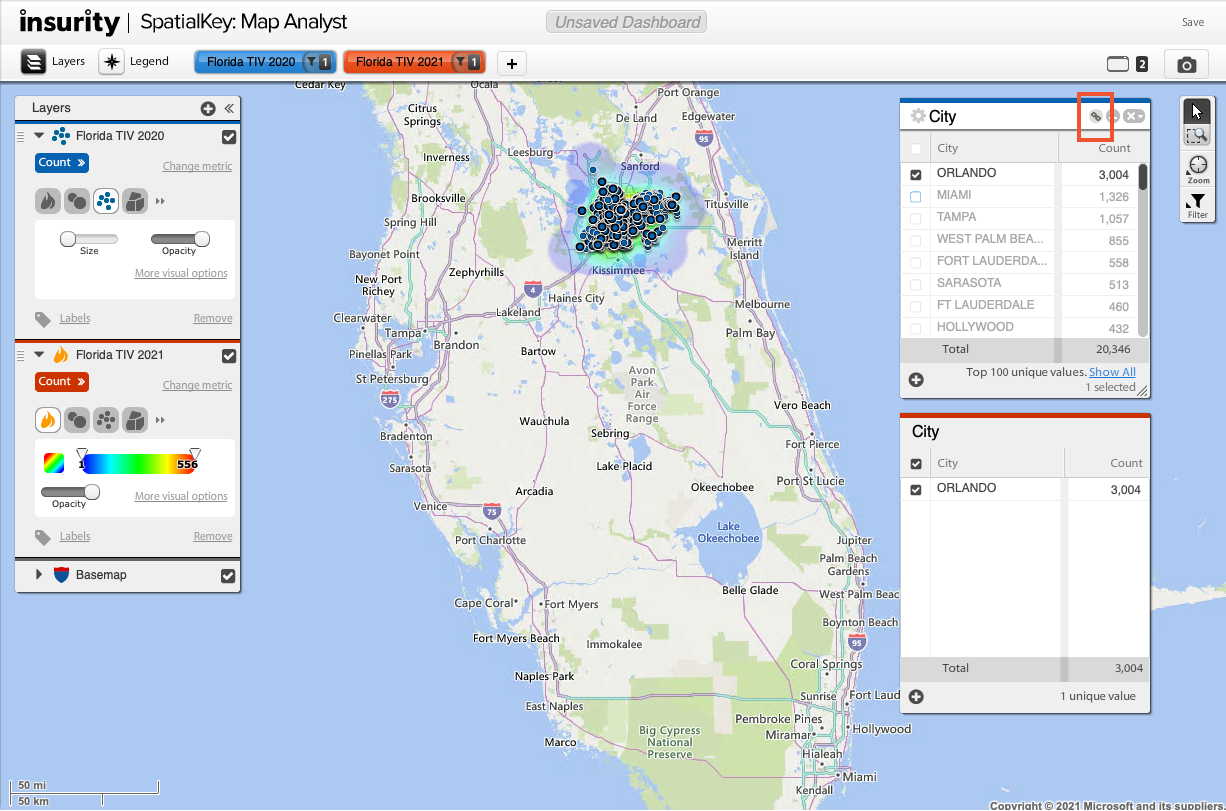
With the synchronization now set up, a new icon 
Here I have doubled clicked on the “Orlando” value from the blue dataset. The red dataset filter pod is filtered down to show only the Orlando values. The map stays in sync with all pod filters as normal.
Using this feature will save time and help your datasets stay in sync as your explore your data. Give it a try!