
This Quick Start Guide walks you through getting up and running with Bridge—a desktop app that securely extracts, transforms, and uploads exposure data from RMS EDM or AIR CEDE formats into SpatialKey. You’ll learn how to install Bridge, access the required API keys, connect to your SQL database, select portfolios, handle currency conversion, and start your data transfer. By the end, you’ll also understand what data is imported, how it’s structured in SpatialKey, and what default settings are applied so you know exactly what to expect once your data is available. Download a PDF version of this Quick Start Guide.
Install Bridge
First, you’ll need to download the Bridge app by clicking the link below and then double-click the .exe file to install the application.
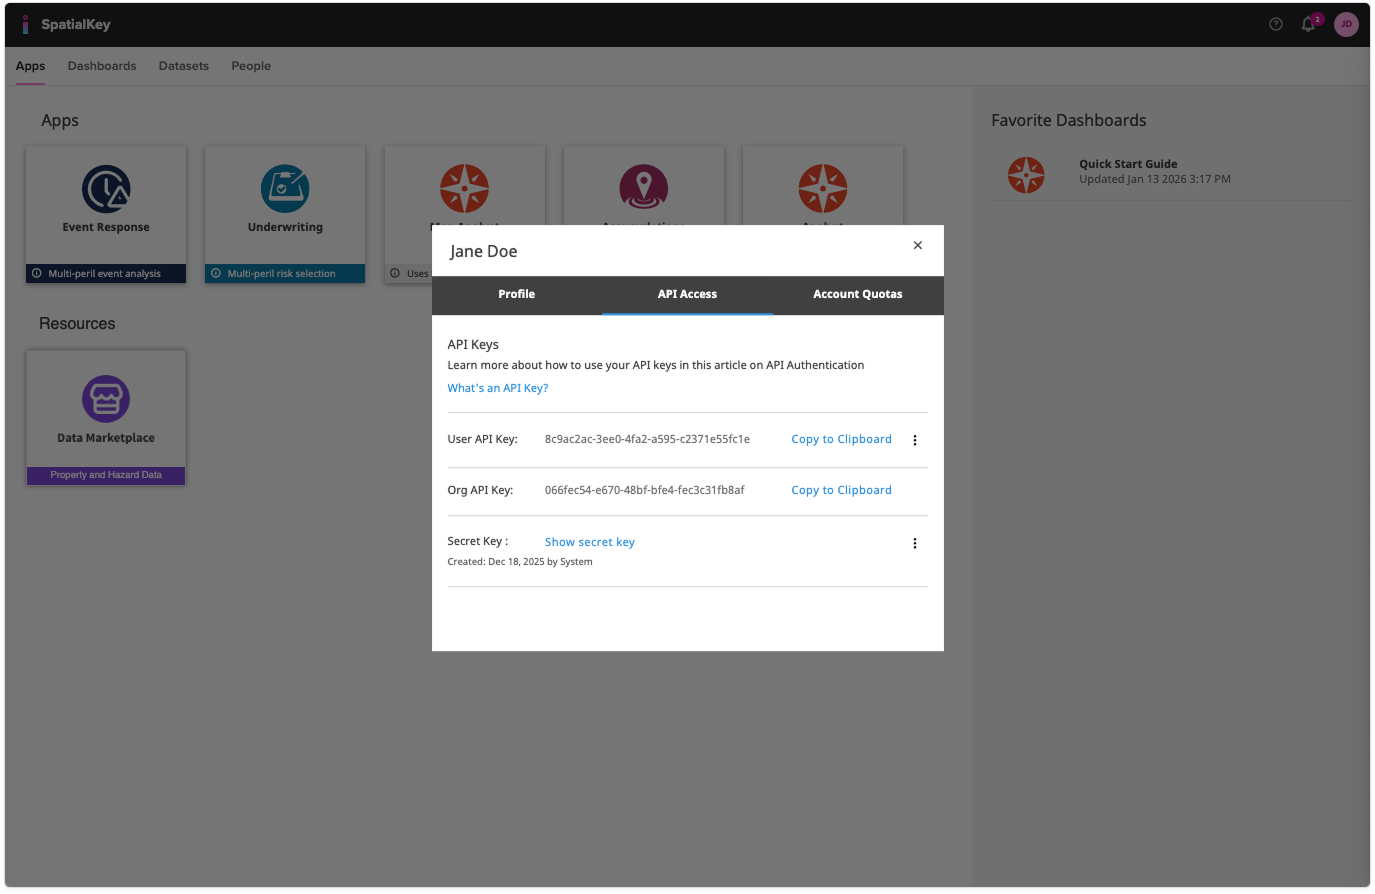
Access the API Keys
To use Bridge, you need to have access to the following three API keys:
- User API Key
- Org API Key
- Secret Key
These keys will be used to authenticate and access Bridge. To access these keys, you will need to be a Data Admin or Super Admin.
- 1) You can check your permission level by clicking on your profile in the top right corner of any page.
Find your API keys
- 2) Once you’ve verified you have API admin permissions, click the “API Access” tab on your profile page to view the User API key, Org API key and Secret Key.
Using Bridge
After installing, open the Bridge application and follow these easy steps:
1. SpatialKey Authentication
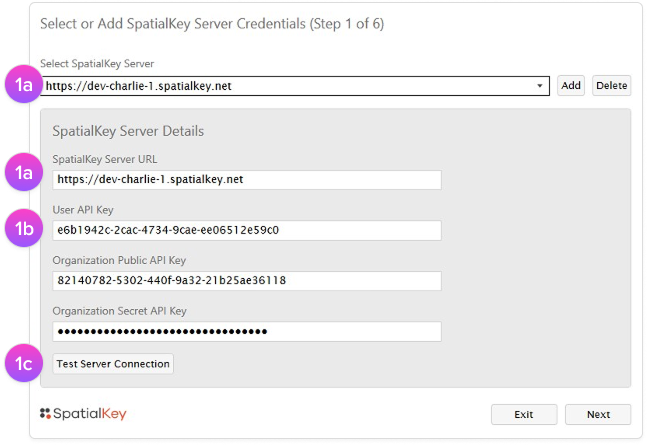
- A) Enter the URL given to you by your account manager. This will be the same URL you use to log in to your SpatialKey account on the web.
- B) Grab those API keys you found on the previous page and enter them here.
- C) Click, “Test Server Connection” and validate the information before clicking, “Next”.

2. SQL Authentication
- A) Select the SQL server from which you wish to import.
- B) You can authenticate to SQL via your Windows or SQL credentials.
- C) Click, “Test Server Connection” and validate the information before clicking, “Next”.
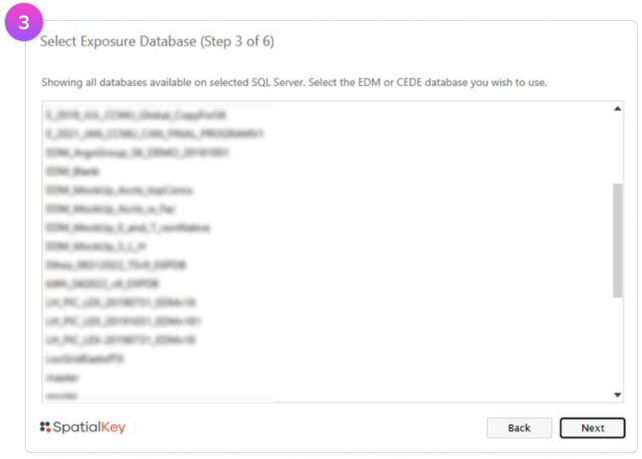
3. Select an EDM or CEDE Database
The list of databases on the SQL will be displayed. Select the EDM or CEDE database containing the exposure data that you want to import.
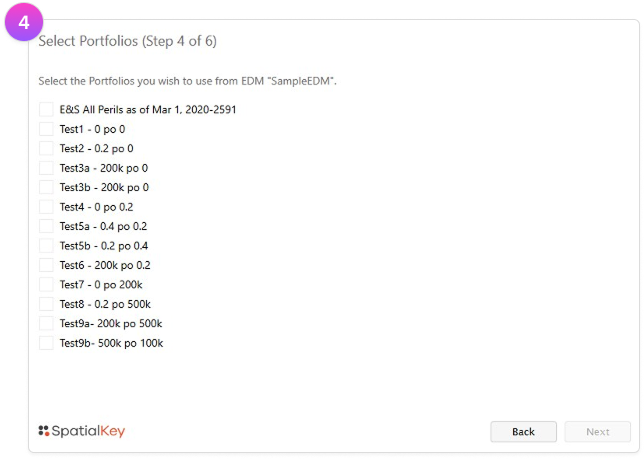
4. Select Portfolio(s) to Import
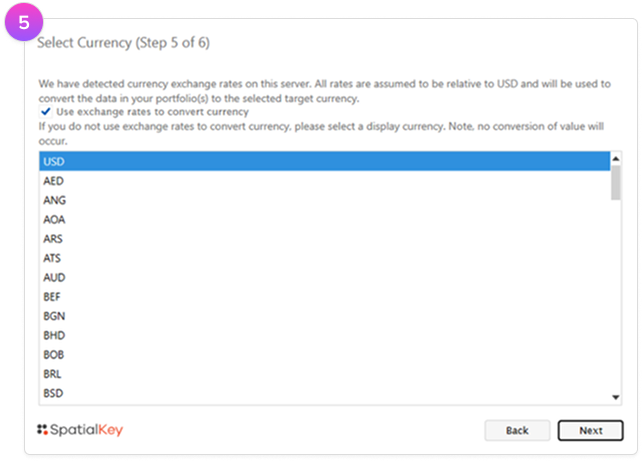
5. Currency Conversion
Bridge assumes that all values and financial terms are in a common currency.
Both the EDM and CEDE formats support the ability to capture exposure using a variety of currencies.
As part of the Bridge import process, data can be converted to a common currency. Data from an EDM will leverage exchange rates contained in RMS’ USERCONFIG database.
Data from CEDE will leverage exchange rates from AIR’s Reference database.
Select the check box to convert currency during the import process. All values and financial terms will be displayed using the selected currency code.
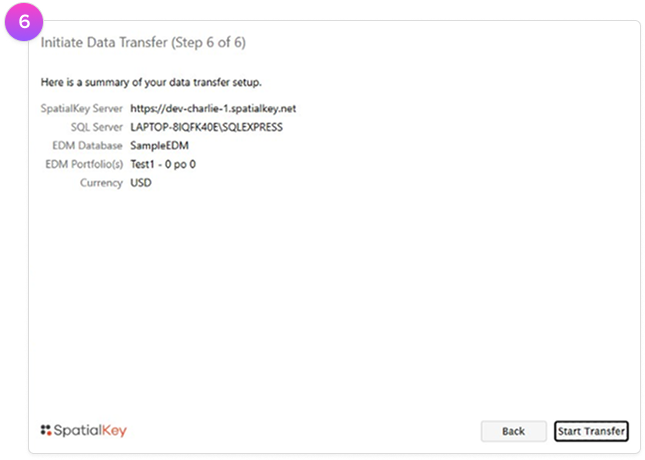
6. Start Transfer
The last step is to review the selections made in earlier steps and then initiate the import process.
Understanding What’s Imported
- EDM fields pulled include address information, peril specific values, limits and deductibles, primary building characteristics, and some secondary characteristics.
- If available, policy information will also be pulled, including policy terms (including special conditions), underwriter name, branch, LOB, and inception and expiration dates.
Import settings
- Bridge ETL will create a new dataset within SpatialKey – there is no option to append or overwrite at this time.
- Dataset permissions will be defaulted to ‘All Users’ as ‘Viewers’.
- Datasets will not be re-geocoded, geocoding results from RMS will be extracted.
- Country and U.S. State, County, and Postal Code thematic boundaries will be enabled by default.
Was this helpful?