
In the People tab, users with User or Super Admin permission can create an account for new users & manage permissions. User permission levels described here refer to platform-level access. See these articles for more on dataset and dashboard sharing & permissions.
Creating a User Account
1. Click “Create User” button on the People tab.
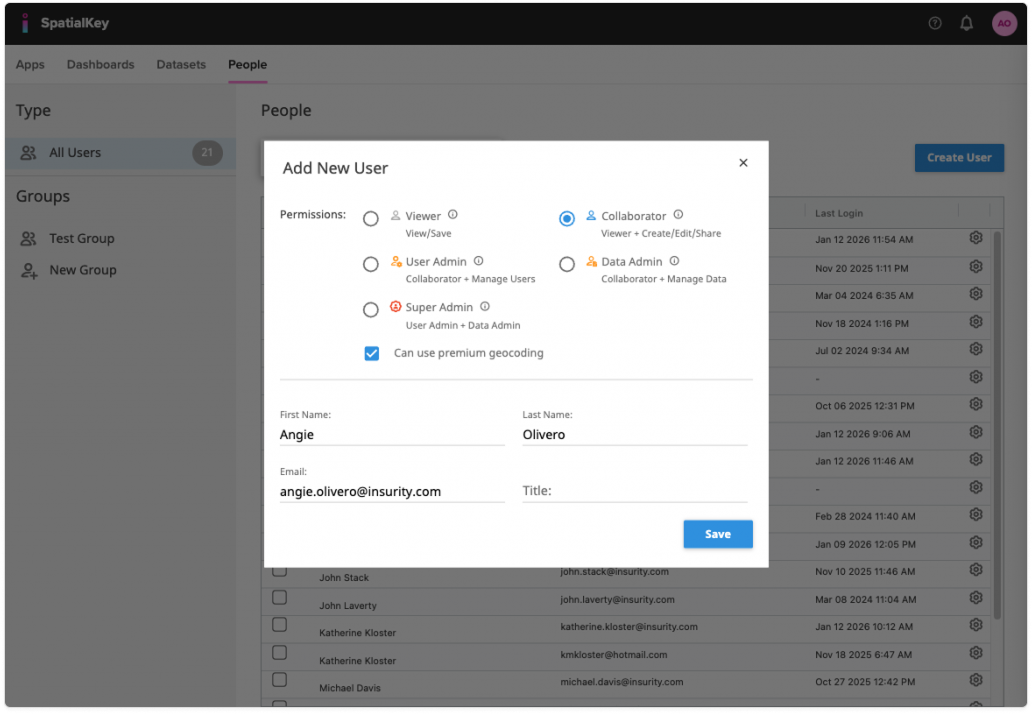
2. Select a permission level:
- Viewer – A viewer can see dashboards and datasets that are provided by other users. They can also create & save dashboards. Viewers cannot upload data, share datasets & dashboards, create & manage users, take ownership & delete data or get access to API keys.
- Collaborator – A collaborator can do everything a viewer can do PLUS they can upload data and share data/dashboards with others. A Collaborator cannot create & manage users, take ownership & delete data or get access to API keys.
- User Admin – A User Admin can do everything a collaborator can do PLUS they can create & manage users. A User Admin cannot take ownership & delete data or get access to API keys.
- Data Admin – A Data Admin can do everything a collaborator can do PLUS they have permission to take ownership of and delete any dataset in the system. They also have access to org API keys. A Data Admin cannot create & manage users.
- Super Admin – A Super Admin can do everything a User Admin and Data Admin can do. This should only be given to users you want to have system-wide admin access.
| User Permission | Viewer | Collaborator | User Admin | Data Admin | Super Admin |
|---|---|---|---|---|---|
| View Datasets & Dashboards Created by or shared with them |
✅ | ✅ | ✅ | ✅ | ✅ |
| Create Dashboards | ✅ | ✅ | ✅ | ✅ | ✅ |
| Save Dashboards | ✅ | ✅ | ✅ | ✅ | ✅ |
| Upload Data | – | ✅ | ✅ | ✅ | ✅ |
| Share Dataset & Dashboards | – | ✅ | ✅ | ✅ | ✅ |
| Create & Manage Users | – | – | ✅ | – | ✅ |
| Take Ownership & Delete Data | – | – | – | ✅ | ✅ |
| Access to API Keys | – | – | – | ✅ | ✅ |
3. Enable or disable premium geocoding.
4. Enter name, email, and title.
5. Click “Save”.
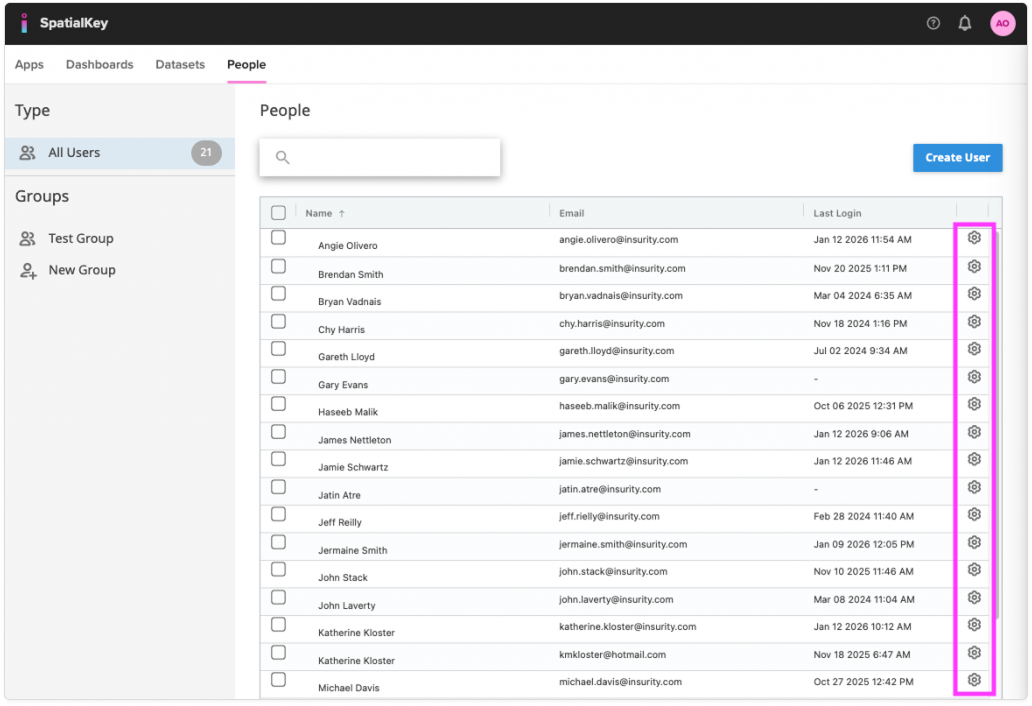
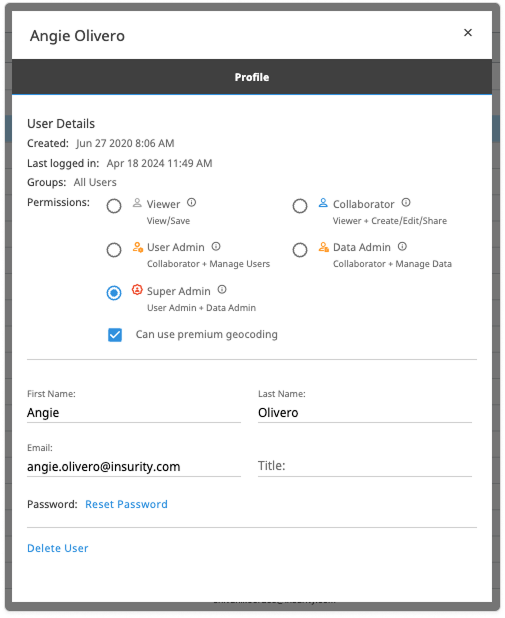
Editing a User
Click on “settings” (a gear icon) to edit a user’s account. The same options as above are available for editing – name, email, title, and permissions. You can also reset the password and delete the user account from this screen.
Adding or Editing a Group
Creating groups is helpful when you regularly need to share datasets or dashboards with multiple users. Instead of assigning permissions to each person individually, you can grant access to the entire group at once. For example, if you have a team of analysts who review monthly or quarterly portfolio views, this feature allows you to share updates with all of them efficiently.
In the People tab, click on the “new group” item in the left panel to add a new group. Click on “settings” (gear icon) next to the group name to edit or delete a group.
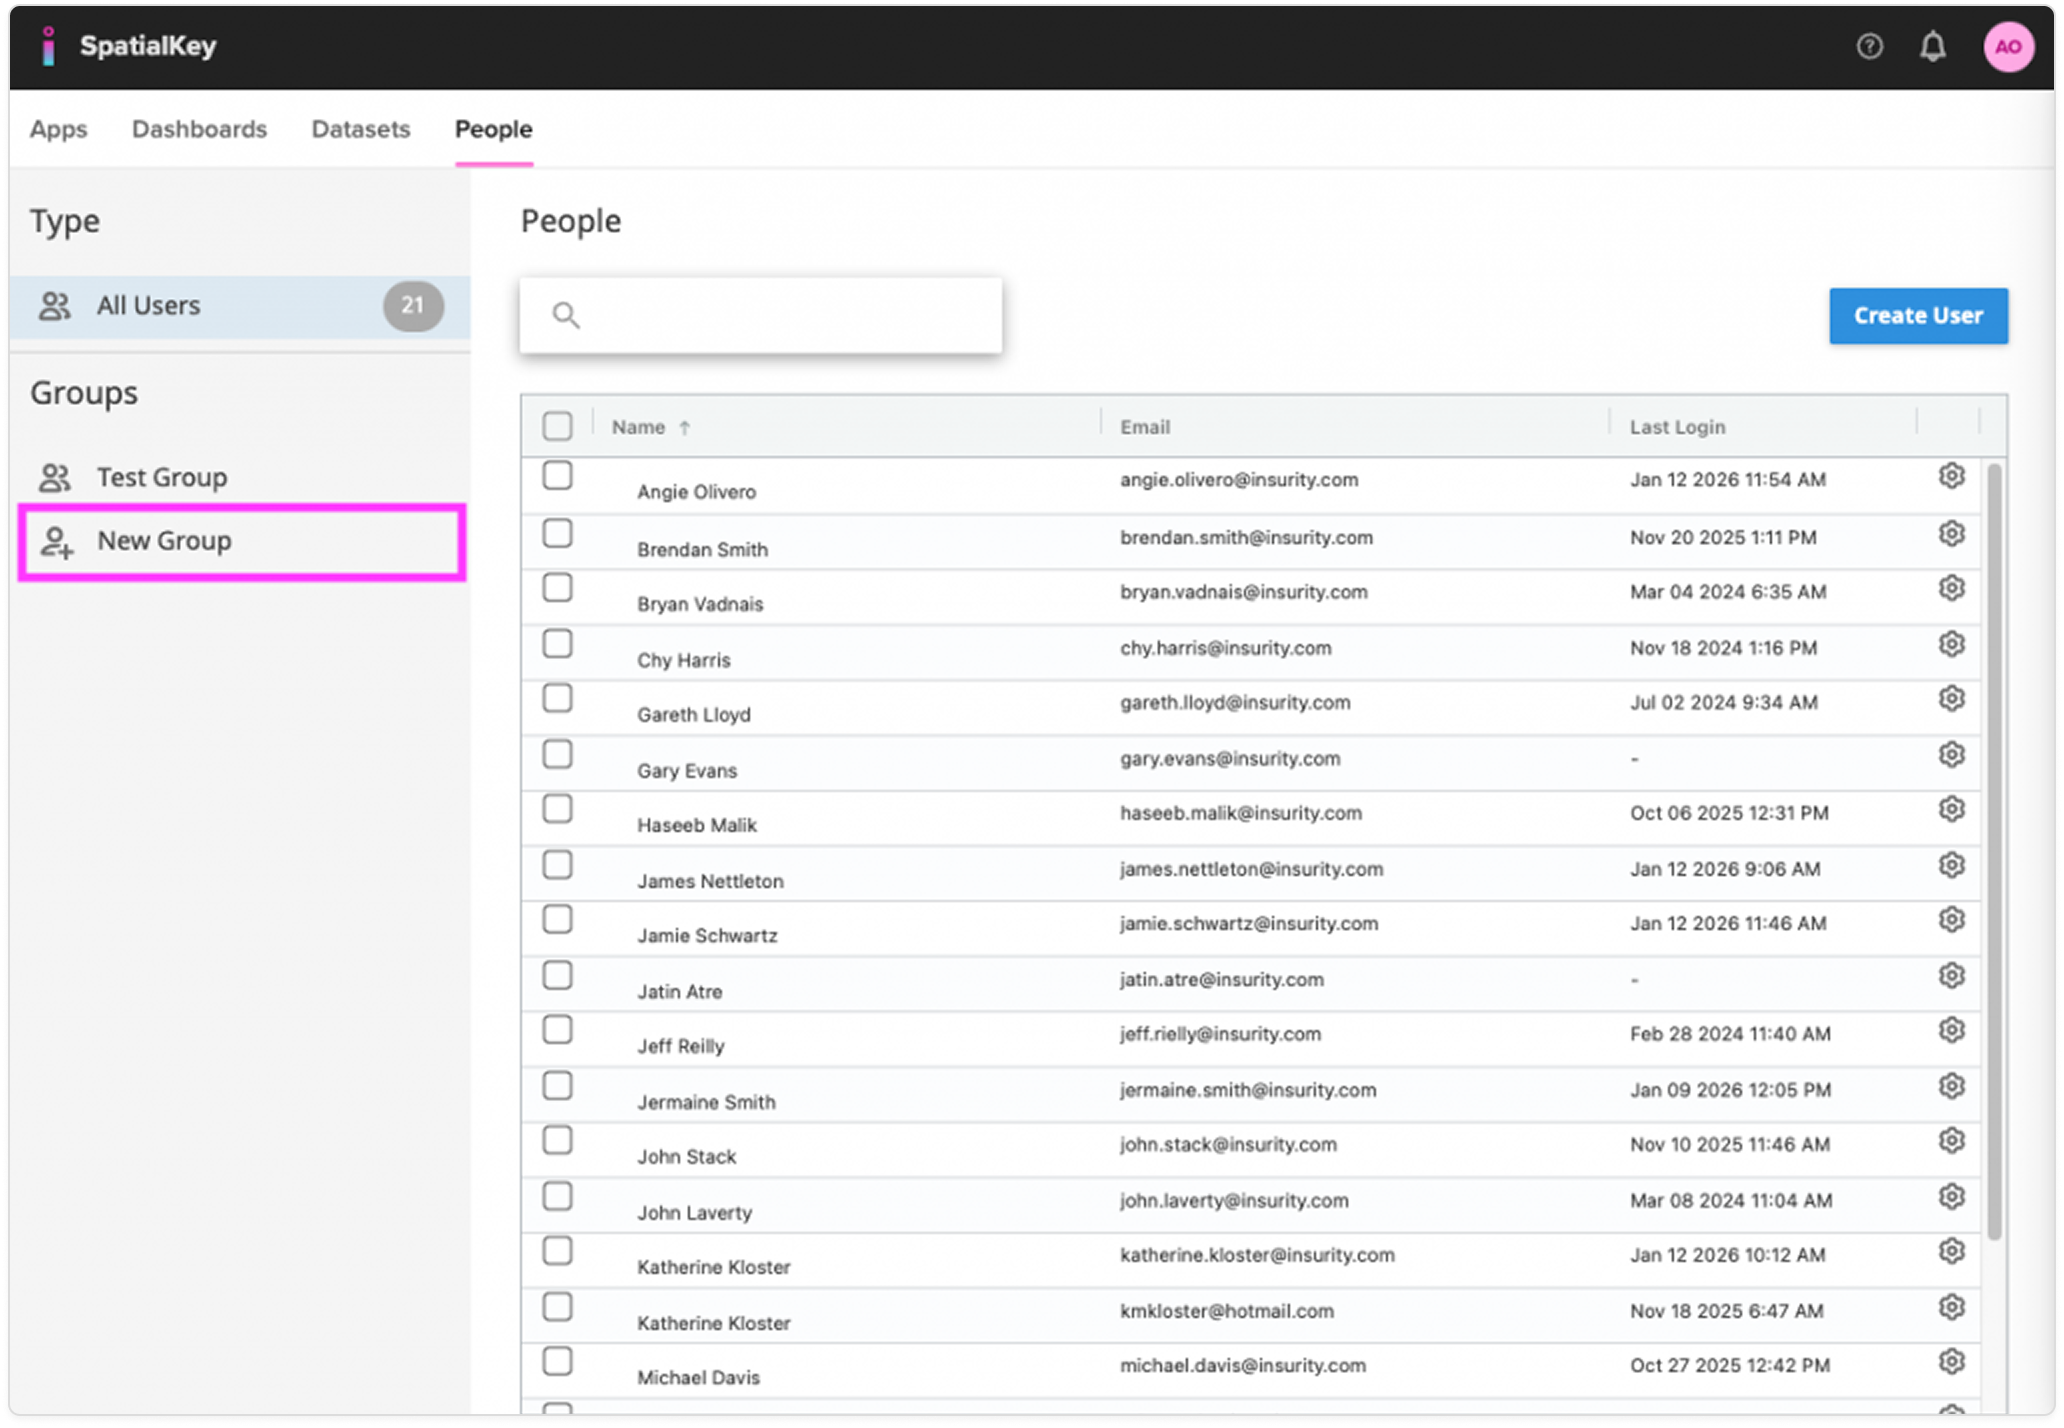
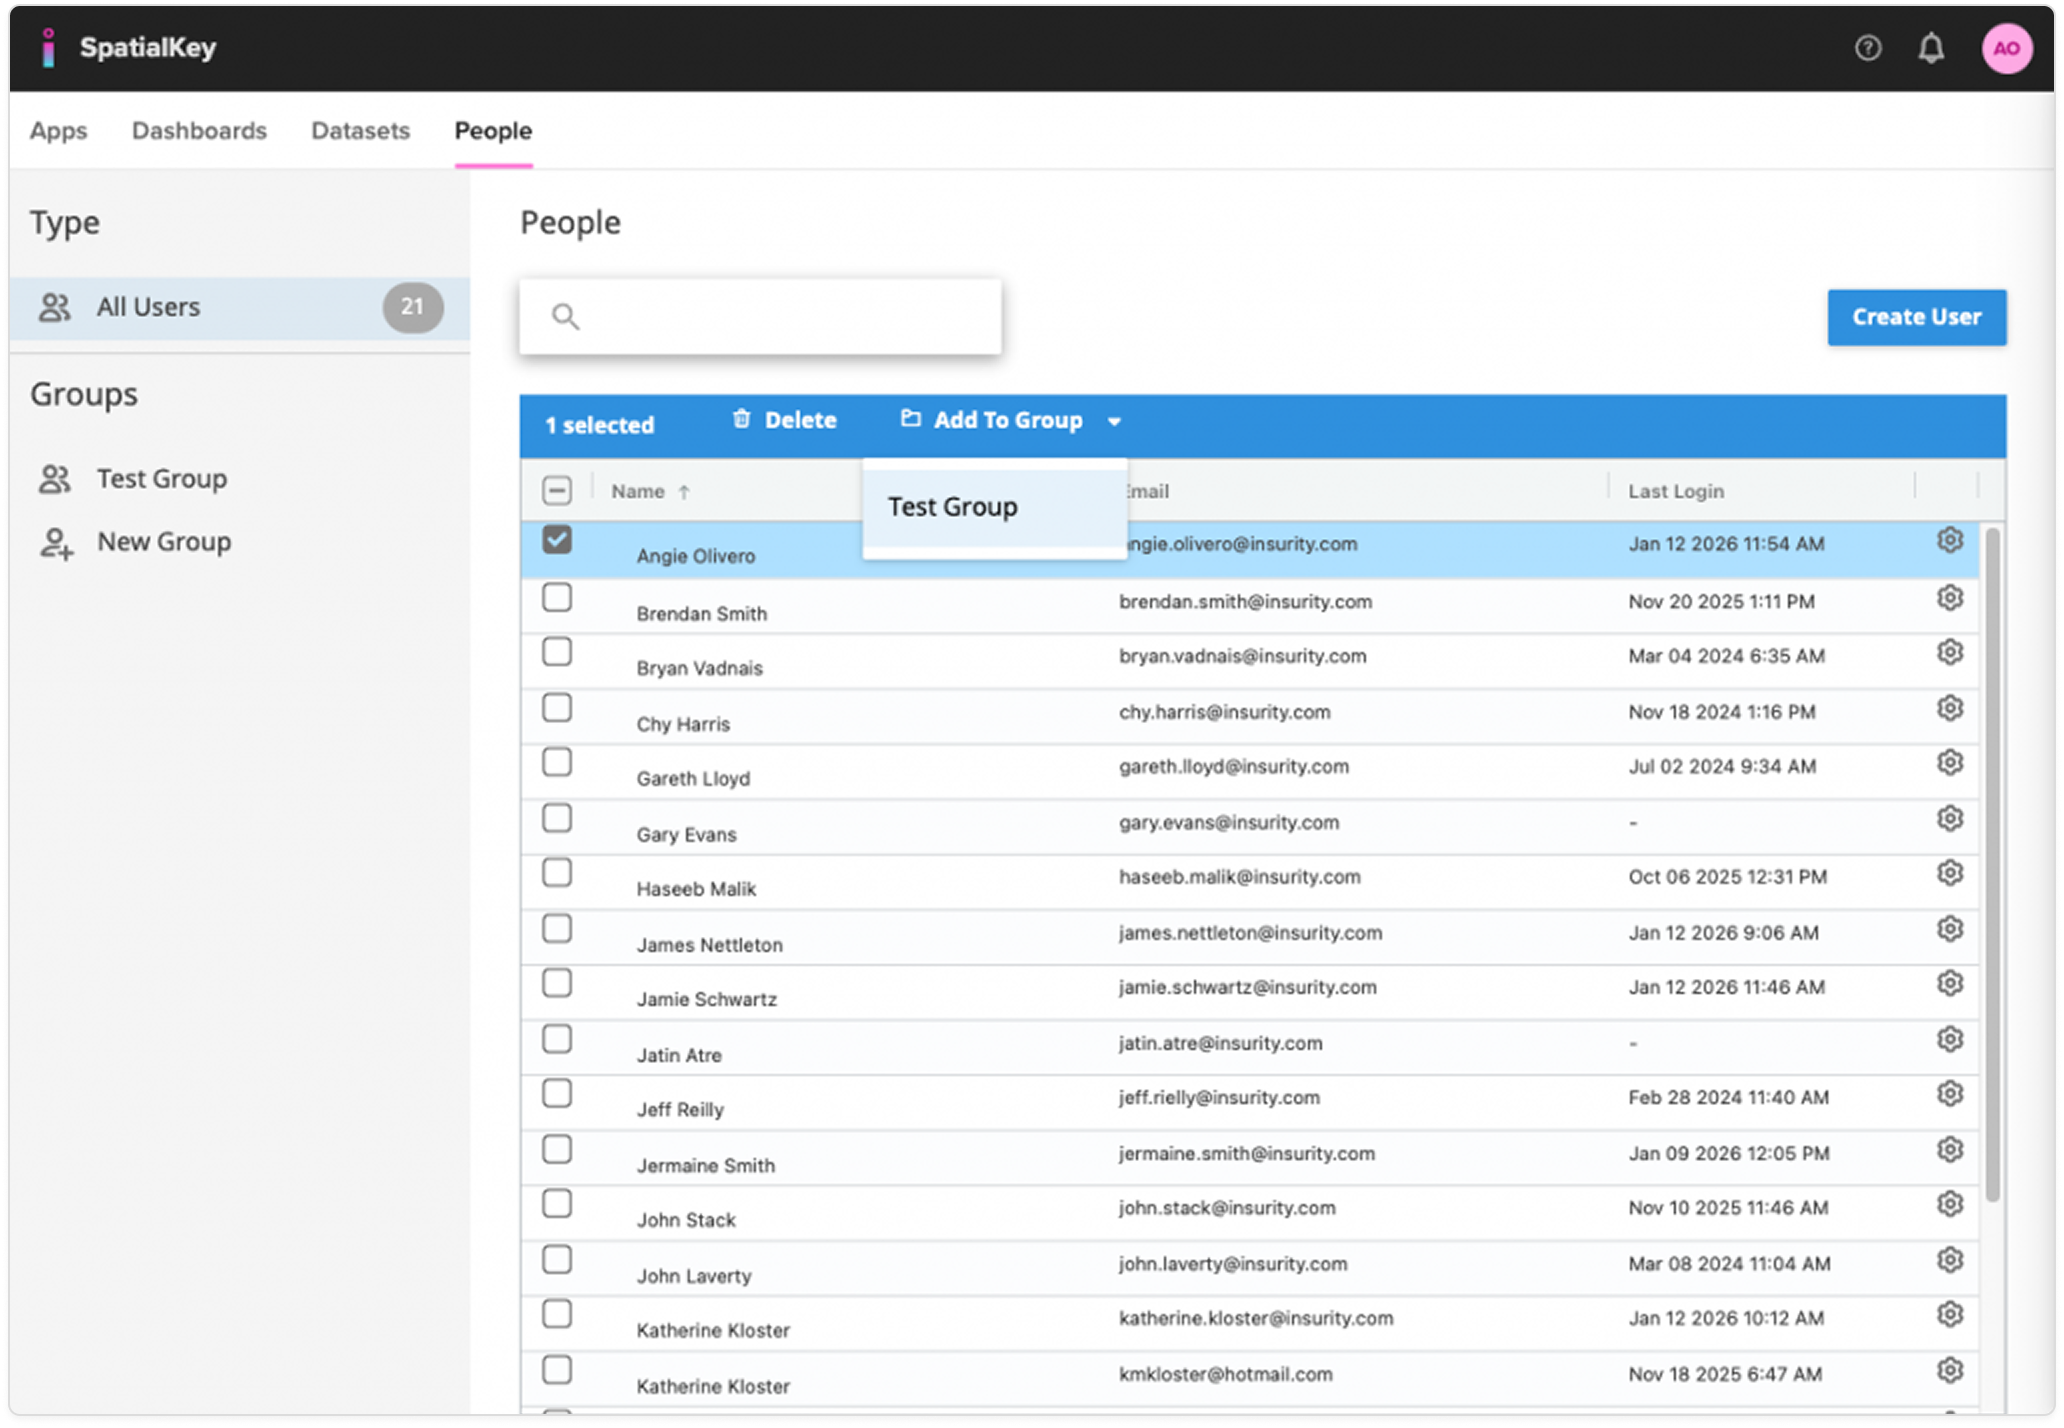
To add a user to a group, click the checkbox for the user, and use the blue banner to add that user to a group. To manager users in a group, click on the group folder, select a user from the group, and use the blue banner to remove them.
Was this helpful?